Ios - 开发
Ios - 开发
uniapp ios 原生插件集成 cocoapods
ruby 安装和卸载
mac 自带了一个 ruby 版本比较低,不用它的 🤫
# 查看 ruby 的安装目录
which -a ruby
# 输出两行说明已安装过
# 路径为/usr/bin/ruby 是 Mac 自带的【切记勿删!】
# 路径为/usr/local/opt/ruby/bin/ruby 是Homebrew 安装的
# 安装命令
brew install ruby
# 查看 ruby 版本
ruby -v
# 如果 ruby 版本仍然是 Mac 自带的版本,执行以下两条命令
echo 'export PATH="/usr/local/opt/ruby/bin:$PATH"' >> ~/.zshrc
source ~/.zshrc
# 查看是否替换
ruby -v
# 可以使用以下命令来删除所有 gem 包
sudo gem uninstall --all
# 可以使用以下命令来删除 gem 包的安装目录
sudo rm -rf /usr/local/lib/ruby/gems
cocoapods 安装和卸载
sudo gem install -n /usr/local/bin cocoapods -V

# 代理安装,升级也是一样的命令
sudo gem install -n /usr/local/bin cocoapods -V --http-proxy=http://127.0.0.1:7890

# 检查安装
pod --version

# 使用淘宝镜像
gem sources --add https://gems.ruby-china.com/ --remove https://rubygems.org/
gem sources -l

# 使用清华大学镜像
gem sources --add https://mirrors.tuna.tsinghua.edu.cn/rubygems/ --remove https://rubygems.org/
gem sources -l

# 换回官方的源
gem sources --remove https://gems.ruby-china.com/
gem sources --clear-all
gem sources -a https://rubygems.org/
gem sources -l

# 更新 gem
sudo gem update --system -V --http-proxy=http://127.0.0.1:7890
uniapp cocoapods 插件包使用
1.初始化
# 项目根目录执行
pod init
# 安装一下
pod install
Podfile 参考
platform :ios, '11.0'

# 忽略所有警告
inhibit_all_warnings!

workspace 'uni-plugin-ios-starter'

target 'uni-plugin-ios-starter' do
  # Comment the next line if you don't want to use dynamic frameworks
  use_frameworks!
  # Pods for uni-plugin-ios-starter
  # 重要: 导入自定义组件库
  pod 'sm-boc-aas-pay', :path =>'./super-modules/sm-boc-aas-pay'
  pod 'sm-pod-lib-starter', :path =>'./super-modules/sm-pod-lib-starter'
end

post_install do |installer|
  # 关闭 bitcode,不关闭上传 appstore 报错
  installer.pods_project.targets.each do |target|
    target.build_configurations.each do |config|
      config.build_settings['ENABLE_BITCODE'] = 'NO'
    end
  end
  # 改变 cocopods 安装的库不支持 11.0 以前的 ios 系统
  installer.generated_projects.each do |project|
    project.targets.each do |target|
      target.build_configurations.each do |config|
        config.build_settings['IPHONEOS_DEPLOYMENT_TARGET'] = '11.0'
      end
    end
 end
end
2.创建一个库
# 示例,需要在库所在的文件夹下执行,例如我的在项目根目录下的 super-modules
pod lib create sm-pod-lib-starter
3.删除不需要的东西
默认创建的库是一个完成的项目里面包含了一些 git example 这样的东西可以删除掉。
4.修改库的 sm-pod-lib-starter.podspec 文件
#
# Be sure to run `pod lib lint sm-pod-lib-starter.podspec' to ensure this is a
# valid spec before submitting.
#
# Any lines starting with a # are optional, but their use is encouraged
# To learn more about a Podspec see https://guides.cocoapods.org/syntax/podspec.html
#

Pod::Spec.new do |s|
  s.name             = 'sm-pod-lib-starter'
  s.version          = '0.1.0'
  s.summary          = 'A short description of sm-pod-lib-starter.'

# This description is used to generate tags and improve search results.
#   * Think: What does it do? Why did you write it? What is the focus?
#   * Try to keep it short, snappy and to the point.
#   * Write the description between the DESC delimiters below.
#   * Finally, don't worry about the indent, CocoaPods strips it!

  s.description      = <<-DESC
TODO: Add long description of the pod here.
                       DESC

  s.homepage         = 'https://github.com/SunSeekerX/sm-pod-lib-starter'
  # s.screenshots     = 'www.example.com/screenshots_1', 'www.example.com/screenshots_2'
  s.license          = { :type => 'MIT', :file => 'LICENSE' }
  s.author           = { 'SunSeekerX' => 'sunseekerx@outlook.com' }
  s.source           = { :git => 'https://github.com/SunSeekerX/sm-pod-lib-starter.git', :tag => s.version.to_s }
  # s.social_media_url = 'https://twitter.com/<TWITTER_USERNAME>'

  s.ios.deployment_target = '11.0'

  s.source_files = 'sm-pod-lib-starter/Classes/**/*'
  s.static_framework = true
  s.xcconfig         = {
    'USER_HEADER_SEARCH_PATHS' => [
        '"$(SRCROOT)/../../SDK/inc"/**'
    ]
  }
  s.user_target_xcconfig = { 'ENABLE_BITCODE' => 'NO' }

  # s.resource_bundles = {
  #   'sm-pod-lib-starter' => ['sm-pod-lib-starter/Assets/*.png']
  # }

  # s.public_header_files = 'Pod/Classes/**/*.h'
  # s.frameworks = 'UIKit', 'MapKit'
  # s.dependency 'AFNetworking', '~> 2.3'
end
5.主项目添加库依赖
在主项目的 Podfile 田添加库依赖,类似于
target 'uni-plugin-ios-starter' do
  # Comment the next line if you don't want to use dynamic frameworks
  use_frameworks!
  # Pods for uni-plugin-ios-starter
  # 重要: 导入自定义组件库
  pod 'sm-boc-aas-pay', :path =>'./super-modules/sm-boc-aas-pay'
  pod 'sm-pod-lib-starter', :path =>'./super-modules/sm-pod-lib-starter'
end
6.重新安装
rm -rf Pods
rm -rf Podfile.lock
7.添加其他链接标识
否则主项目无法找到 pod 创建的库
在主项目的 build settings 里面搜索 Other linker Flags 添加 $(inherited),否则无法加载pod lib
8.打开 uni-plugin-ios-starter.xcworkspace 进行开发
9.编译项目测试
uniapp ios 原生插件依赖 framework 问题
插件库搜索头文件
FRAMEWORK_SEARCH_PATHSuniapp cocoapods 插件包一些问题
如果插件类找不到可以输出一下
在 AppDelegate.m 里面 didFinishLaunchingWithOptions 输出以下测试 log
NSLog(@"SsxSuperModuleCrisp=%@", NSClassFromString(@"SsxSuperModuleCrisp"));添加了新的类如果出现一些找不到的问题可以使用
# 更新下 pod 依赖
pod update
完美修改项目名
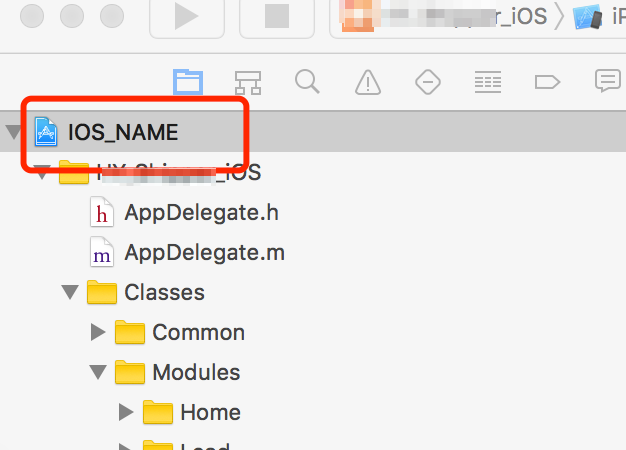
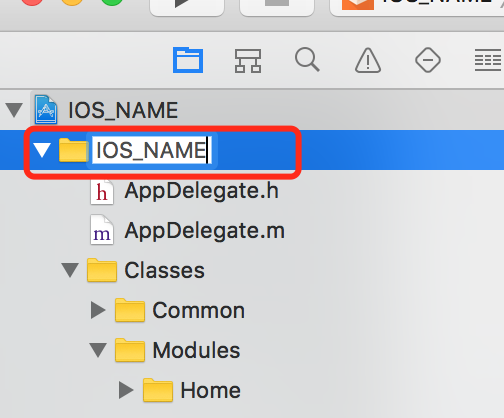
1.修改工程名字
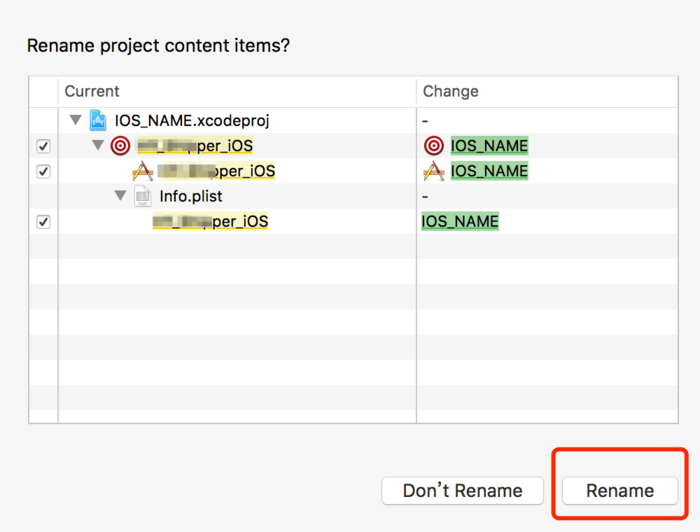
打开工程 点击工程名称 回车 直接修改
此时会弹出一个对话框,点击 Rename
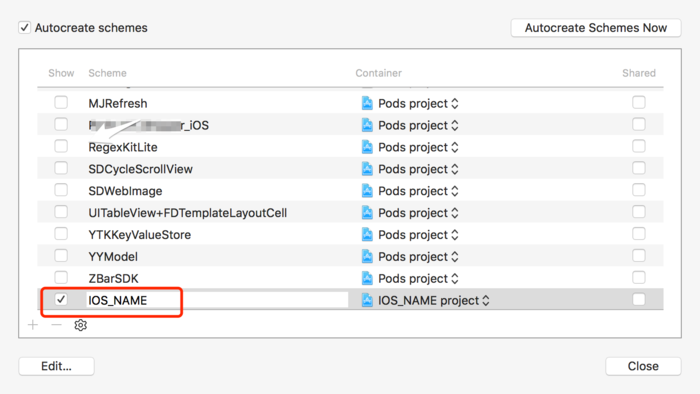
2.修改 scheme 名称
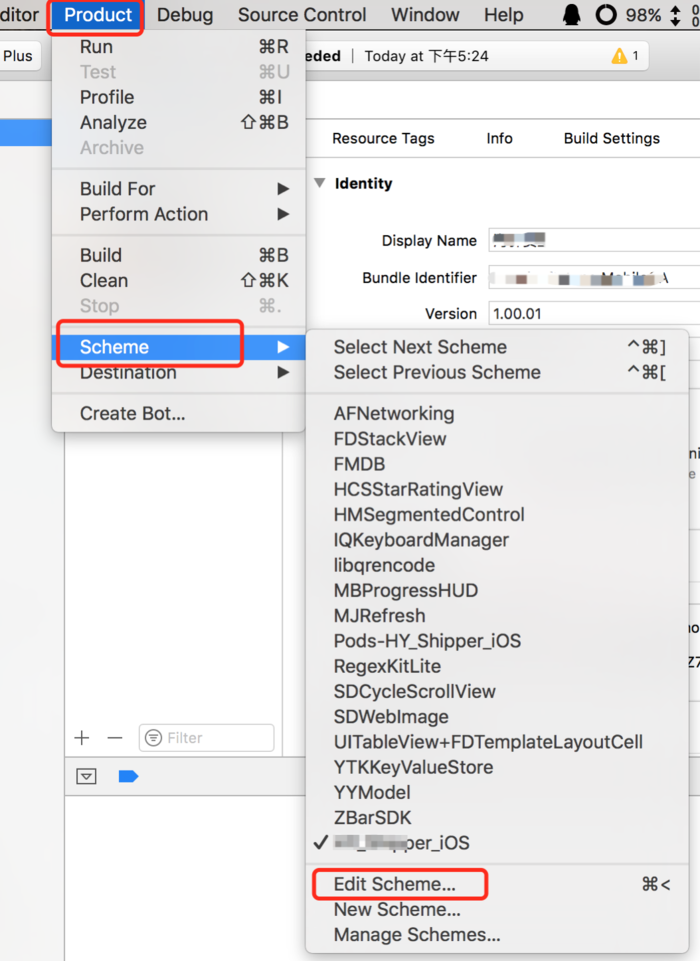
弹出对话框 会车直接修改 修改完成之后 点击 Close
3.修改目录名称
点击工程内需要修改名字的目录 回车直接修改
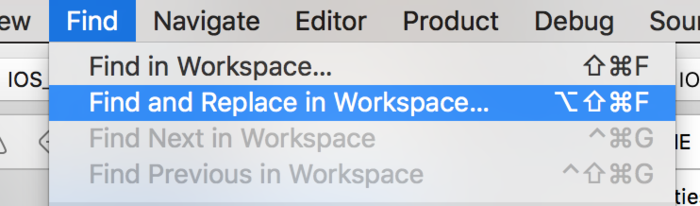
点击 Find 选择 查找替换
点击全部替换
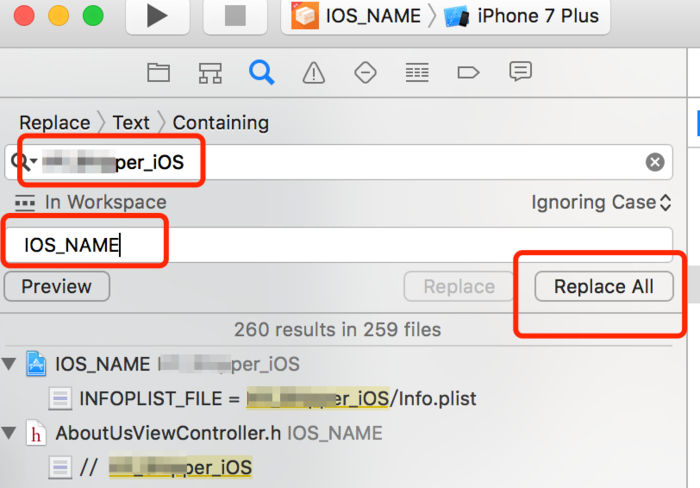
部分替换不了的 手动点进去修改
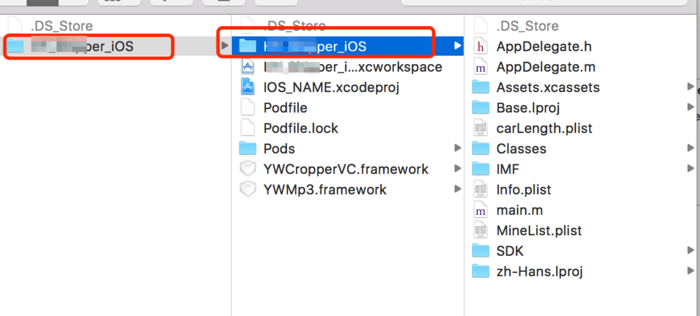
4.修改实体文件夹名称
在文件夹内 将对应的文件夹回车直接修改

5.修改.xcodeproj 右键显示包内容
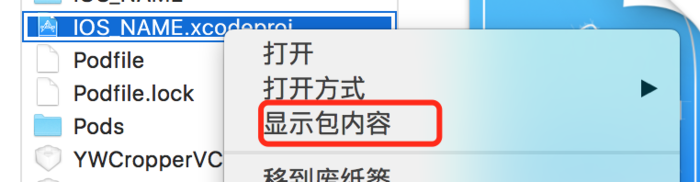
双击打开.pbxproj 文件
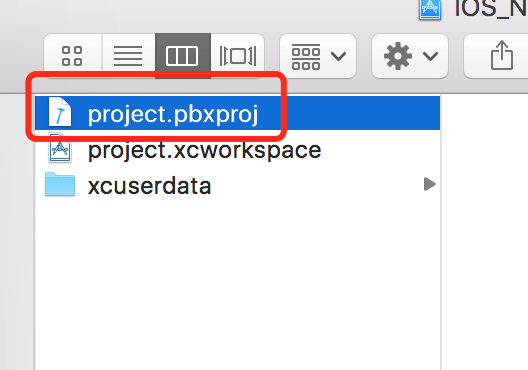
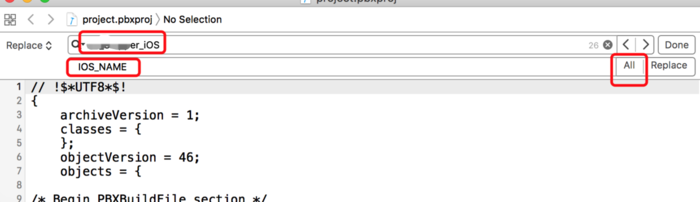
查找替换全部
6.如果有 pod (无 pod 忽略)
删除原来的 pod 对应的三项
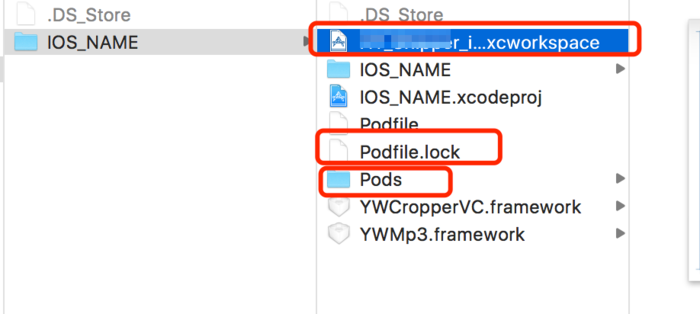
重新 pod install (注意 不要用 pod install --verbose --no-repo-update )
7.修改 target 名称
选中 target 名称按回车就能修改。
8.总结
- 修改完成搜索原来的名称应该是没有结果的,建议用
vscode搜索项目下所有的文件,比如我的关键词是HBuilder - 全局替换习惯用
vscode会比较方便和直观一点 - 全局替换应该要在
xcode内修改好其他可以直接修改名字的地方之后进行
xcode
历史版本下载
https://developer.apple.com/download/all/
ios 系统版本发布时间
| Version | Build No. | Architecture | Last Update | End Of Life |
|---|---|---|---|---|
| 1.1.4 | 4A102 | 32-bit ARM | 26 Feb 2008 | N/A |
| 2.2.1 | 5H11 | 32-bit ARM | 27 Jan 2009 | N/A |
| 3.1.3 | 7E18 | 32-bit ARM | 02 Feb 2010 | iPhone 1st Gen iPod 1st Gen |
| 4.3.5 | 8L1 | 32-bit ARM | 25 July 2011 | iPhone 3G iPod 2nd Gen |
| 5.1.1 | 9B206 | 32-bit ARM | 07 May 2012 | iPad 1st Gen iPod 3rd Gen |
| 6.1.6 | 10B500 | 32-bit ARM | 21 Feb 2014 | iPhone 3GS iPod 4th Gen |
| 7.1.2 | 11D257 | 32/64-bit ARM | 30 Jun 2014 | iPhone 4 |
| 8.4.1 | 12H321 | 32/64-bit ARM | 13 Aug 2015 | N/A |
| 9.3.5 | 13G36 | 32/64-bit ARM | 25 Aug 2016 | iPad 2, 3rd, Mini (WiFi) iPod 5th |
| 9.3.6 | 13G37 | 32/64-bit ARM | 22 July 2019 | iPhone 4S iPad Mini (Wi-Fi + Cellular) |
| 10.3.3 | 14G60 | 32/64-bit ARM | 19 July 2017 | iPhone 5C iPad 4th Gen (WiFi) |
| 10.3.4 | 14G61 | 32/64-bit ARM | 22 July 2019 | iPhone 5 iPad 4th Gen (WiFi+ Cellular) |
| 11.4.1 | 15G77 | 64-bit ARM | 09 July 2018 | N/A |
| 12.5.6 | 16H71 | 64-bit ARM | 31 Aug 2022 | iPhone 5S, 6/6 Plus iPad Mini 2, Mini 3, Air 1st iPod 6th Gen |
| 13.7 | 17H35 | 64-bit ARM | 01 Sep 2020 | iPad Air 2nd, Mini 4 |
| 14.8.1 | 18H107 | 64-bit ARM | 26 Oct 2021 | N/A |
| 15.7 | 19H12 | 64-bit ARM | 12 Sep 2022 | iPhone 6S, 7, SE iPad Air 2, Mini 4 iPod 7th |
| 16.0 | 20A362 | 64-bit ARM | 12 Sep 2022 | N/A |
| 16.0.1 (iPhone 14) | 20A371 | 64-bit ARM | 15 Sep 2022 | N/A |
| 16.1 Beta 1 | 20B5045d | 64-bit ARM | 14 Sep 2022 | N/A |
来源: https://www.gkgigs.com/list-apple-ios-version-history/
Xcode 最低要求和支持的 SDK
| Xcode 版本 | 要求的最低 OS 版本 | SDK | 架构 | 部署目标 | 模拟器 | Swift |
|---|---|---|---|---|---|---|
| Xcode 14 | macOS Monterey 12.5 | iOS 16 macOS 12.3 tvOS 16 watchOS 9 DriverKit 22 | i386 x86_64 armv7k arm64 arm64e arm64_32 | iOS 11-16 iPadOS 13-16 macOS 10.13-12.5 tvOS 9-16 watchOS 4-9 DriverKit 19-22 | iOS 12.4-16 tvOS 12.4-16 watchOS 7-9 | Swift 4 Swift 4.2 Swift 5.7 |
| Xcode 13.4 | macOS Monterey 12 | iOS 15.5 macOS 12.3 Apple tvOS 15.4 watchOS 8.5 DriverKit 21.4 | i386 x86_64 armv7 armv7s armv7k arm64 arm64e arm64_32 | iOS 9-15.5 iPadOS 13-15.5 macOS 10.9-12.3 Apple tvOS 9-15.4 watchOS 2-8.5 DriverKit 19-21.4 | iOS 12.4-15.5 Apple tvOS 12.4-15.4 watchOS 7-8.5 | Swift 4 Swift 4.2 Swift 5.6 |
| Xcode 13.3 | macOS Monterey 12 | iOS 15.4 macOS 12.3 Apple tvOS 15.4 watchOS 8.5 DriverKit 21.4 | i386 x86_64 armv7 armv7s armv7k arm64 arm64e arm64_32 | iOS 9-15.4 iPadOS 13-15.4 macOS 10.9-12.3 Apple tvOS 9-15.4 watchOS 2-8.5 DriverKit 19-21.4 | iOS 12.4-15.4 Apple tvOS 12.4-15.4 watchOS 7-8.5 | Swift 4 Swift 4.2 Swift 5.6 |
| Xcode 13.2 | macOS Big Sur 11.3 | iOS 15.2 macOS 12.1 Apple tvOS 15.2 watchOS 8.3 DriverKit 21.2 | i386 x86_64 armv7 armv7s armv7k arm64 arm64e arm64_32 | iOS 9-15.2 iPadOS 13-15.2 macOS 10.9-12.2 Apple tvOS 9-15.2 watchOS 2-8.3 DriverKit 19-21.2 | iOS 10.3.1-15.2 Apple tvOS 10.2-15.2 watchOS 3.2-8.3 | Swift 4 Swift 4.2 Swift 5.5 |
| Xcode 13.1 | macOS Big Sur 11.3 | iOS 15 macOS 12 Apple tvOS 15 watchOS 8 DriverKit 21.0.1 | i386 x86_64 armv7 armv7s armv7k arm64 arm64e arm64_32 | iOS 9-15 iPadOS 13-15 macOS 10.9-12 Apple tvOS 9-15 watchOS 2-8 DriverKit 19-21.0.1 | iOS 10.3.1-15 Apple tvOS 10.2-15 watchOS 3.2-8 | Swift 4 Swift 4.2 Swift 5.5 |
| Xcode 13 | macOS Big Sur 11.3 | iOS 15 macOS 11.3 Apple tvOS 15 watchOS 8 DriverKit 20.4 | i386 x86_64 armv7 armv7s armv7k arm64 arm64e arm64_32 | iOS 9-15 iPadOS 13-15 macOS 10.9-11.3 Apple tvOS 9-15 watchOS 2-8 DriverKit 19-20.4 | iOS 10.3.1-15 Apple tvOS 10.2-15 watchOS 3.2-8 | Swift 4 Swift 4.2 Swift 5.5 |
| Xcode 12.5.1 | macOS Big Sur 11 | iOS 14.5 macOS 11.3 Apple tvOS 14.5 watchOS 7.4 DriverKit 20.4 | i386 x86_64 armv7 armv7s armv7k arm64 arm64e arm64_32 | iOS 9-14.7 iPadOS 13-14.7 macOS 10.9-11.5 Apple tvOS 9-14.7 watchOS 2-7.6 DriverKit 19-20.4 | iOS 10.3.1-14.5 Apple tvOS 10.2-14.5 watchOS 3.2-7.4 | Swift 4 Swift 4.2 Swift 5.4 |
| Xcode 12.5 | macOS Big Sur 11 | iOS 14.5 macOS 11.3 Apple tvOS 14.5 watchOS 7.4 DriverKit 20.4 | i386 x86_64 armv7 armv7s armv7k arm64 arm64e arm64_32 | iOS 9-14.6 iPadOS 13-14.6 macOS 10.9-11.4 Apple tvOS 9-14.6 watchOS 2-7.5 DriverKit 19-20.4 | iOS 10.3.1-14.5 Apple tvOS 10.2-14.5 watchOS 3.2-7.4 | Swift 4 Swift 4.2 Swift 5.4 |
| Xcode 12.4 | macOS Catalina 10.15.4 (搭载 Intel 芯片的 Mac) macOS Big Sur 11 (搭载 Apple 芯片的 Mac) | iOS 14.4 macOS 11.1 Apple tvOS 14.3 watchOS 7.2 DriverKit 20.2 | i386 x86_64 armv7 armv7s armv7k arm64 arm64e arm64_32 | iOS 9-14.4 iPadOS 13-14.4 macOS 10.9-11.1 Apple tvOS 9-14.3 watchOS 2-7.2 DriverKit 19-20.2 | iOS 10.3.1-14.4 Apple tvOS 10.2-14.3 watchOS 3.2-7.2 | Swift 4 Swift 4.2 Swift 5.3 |
| Xcode 12.3 | macOS Catalina 10.15.4 (搭载 Intel 芯片的 Mac) macOS Big Sur 11 (搭载 Apple 芯片的 Mac) | iOS 14.3 macOS 11.1 Apple tvOS 14.3 watchOS 7.2 DriverKit 20.2 | i386 x86_64 armv7 armv7s armv7k arm64 arm64e arm64_32 | iOS 9-14.3 iPadOS 13-14.3 macOS 10.9-11.1 Apple tvOS 9-14.3 watchOS 2-7.2 DriverKit 19-20.2 | iOS 10.3.1-14.3 Apple tvOS 10.2-14.3 watchOS 3.2-7.2 | Swift 4 Swift 4.2 Swift 5.3 |
| Xcode 12.2 | macOS Catalina 10.15.4 (搭载 Intel 芯片的 Mac) macOS Big Sur 11 (搭载 Apple 芯片的 Mac) | iOS 14.2 macOS 11 Apple tvOS 14.2 watchOS 7.1 DriverKit 20 | i386 x86_64 armv7 armv7s armv7k arm64 arm64e arm64_32 | iOS 9-14.2 iPadOS 13-14.2 macOS 10.9-11 Apple tvOS 9-14.2 watchOS 2-7.1 DriverKit 19-20 | iOS 10.3.1-14.2 Apple tvOS 10.2-14.2 watchOS 3.2-7.1 | Swift 4 Swift 4.2 Swift 5.3 |
| Xcode 12.1 | macOS Catalina 10.15.4 (搭载 Intel 芯片的 Mac) macOS Big Sur 11 (搭载 Apple 芯片的 Mac) | iOS 14.1 macOS 10.15.6 Apple tvOS 14 watchOS 7 DriverKit 19 | i386 x86_64 armv7 armv7s armv7k arm64 arm64e arm64_32 | iOS 9-14.1 iPadOS 13-14.1 macOS 10.9-11 Apple tvOS 9-14 watchOS 2-7 DriverKit 19 | iOS 10.3.1-14.1 Apple tvOS 10.2-14 watchOS 2-7 | Swift 4 Swift 4.2 Swift 5.3 |
| Xcode 12 | macOS Catalina 10.15.4 (基于 Intel 的 Mac) | iOS 14 macOS 10.15.6 Apple tvOS 14 watchOS 7 DriverKit 19 | i386 x86_64 armv7 armv7s armv7k arm64 arm64e arm64_32 | iOS 9-14 iPadOS 13-14 macOS 10.6-10.15.6 Apple tvOS 9-14 watchOS 2-7 DriverKit 19 | iOS 10.3.1-14 Apple tvOS 10.2-14 watchOS 3.2-7 | Swift 4 Swift 4.2 Swift 5.3 |
| Xcode 11.7 | macOS Catalina 10.15.2 | iOS 13.7 macOS 10.15.6 Apple tvOS 13.4 watchOS 6.2 DriverKit 19 | i386 x86_64 armv7 armv7s armv7k arm64 arm64e arm64_32 | iOS 8-13.7 iPadOS 13-13.7 macOS 10.6-10.15.6 Apple tvOS 9-13.4 watchOS 2-6.2 DriverKit 19 | iOS 10.3.1-13.7 Apple tvOS 10.2-13.4 watchOS 3.2-6.2 | Swift 4 Swift 4.2 Swift 5.2 |
| Xcode 11.6 | macOS Catalina 10.15.2 | iOS 13.6 macOS 10.15.6 Apple tvOS 13.4 watchOS 6.2 DriverKit 19 | i386 x86_64 armv7 armv7s armv7k arm64 arm64e arm64_32 | iOS 8-13.6 iPadOS 13-13.6 macOS 10.6-10.5.6 Apple tvOS 9-13.4 watchOS 2-6.2 DriverKit 19 | iOS 10.3.1-13.6 Apple tvOS 10.2-13.4 watchOS 3.2-6.2 | Swift 4 Swift 4.2 Swift 5.2 |
| Xcode 11.5 | macOS Catalina 10.15.2 | iOS 13.5 macOS 10.15.4 Apple tvOS 13.4 watchOS 6.2 DriverKit 19 | i386 x86_64 armv7 armv7s armv7k arm64 arm64e arm64_32 | iOS 8-13.5 iPadOS 13-13.5 macOS 10.6-10.15.4 Apple tvOS 9-13.4 watchOS 2-6.2 DriverKit 19 | iOS 10.3.1-13.5 Apple tvOS 10.2-13.4 watchOS 3.2-6.2 | Swift 4 Swift 4.2 Swift 5.2 |
| Xcode 11.4.x | macOS Catalina 10.15.2 | iOS 13.4 macOS 10.15.4 Apple tvOS 13.4 watchOS 6.2 DriverKit 19 | i386 x86_64 armv7 armv7s armv7k arm64 arm64e arm64_32 | iOS 8-13.4.x iPadOS 13-13.4.x macOS 10.6-10.15.4 Apple tvOS 9-13.4 watchOS 2-6.2 DriverKit 19 | iOS 10.3.1-13.4.x Apple tvOS 10.2-13.4 watchOS 3.2-6.2 | Swift 4 Swift 4.2 Swift 5.2 |
| Xcode 11.3.x | macOS Mojave 10.14.4 | iOS 13.3 macOS 10.15.2 Apple tvOS 13.3 watchOS 6.1.1 DriverKit 19 | i386 x86_64 armv7 armv7s armv7k arm64 arm64e arm64_32 | iOS 8-13.3 iPadOS 13-13.3 macOS 10.6-10.15.2 Apple tvOS 9-13.3 watchOS 2-6.1.1 DriverKit 19 | iOS 10.3.1-13.3 Apple tvOS 10.2-13.3 watchOS 3.2-6.1.1 | Swift 4 Swift 4.2 Swift 5.1 |
| Xcode 11.2.x | macOS Mojave 10.14.4 | iOS 13.2 macOS 10.15.1 Apple tvOS 13.2 watchOS 6.1 DriverKit 19 | i386 x86_64 armv7 armv7s armv7k arm64 arm64e arm64_32 | iOS 8-13.2.x iPadOS 13-13.2.x macOS 10.6-10.15.1 Apple tvOS 9-13.2 watchOS 2-6.1 DriverKit 19 | iOS 10.3.1-13.2.x Apple tvOS 10.2-13.2 watchOS 3.2-6.1 | Swift 4 Swift 4.2 Swift 5.1 |
| Xcode 11.1 | macOS Mojave 10.14.4 | iOS 13.1 macOS 10.15 Apple tvOS 13 watchOS 6 DriverKit 19 | i386 x86_64 armv7 armv7s armv7k arm64 arm64e arm64_32 | iOS 8-13.1 iPadOS 13-13.1 macOS 10.6-10.15 Apple tvOS 9-13 watchOS 2-6 DriverKit 19 | iOS 10.3.1-13.1 Apple tvOS 10.2-13 watchOS 3.2-6 | Swift 4 Swift 4.2 Swift 5.1 |
| Xcode 11 | macOS Mojave 10.14.4 | iOS 13 macOS 10.15 Apple tvOS 13 watchOS 6 DriverKit 19 | i386 x86_64 armv7 armv7s armv7k arm64 arm64e arm64_32 | iOS 8-13 iPadOS 13 macOS 10.6-10.15 Apple tvOS 9-13 watchOS 2-6 DriverKit 19 | iOS 10.3.1-13 Apple tvOS 10.2-13 watchOS 3.2-6 | Swift 4 Swift 4.2 Swift 5.1 |
| Xcode 10.3 | macOS Mojave 10.14.3 | iOS 12.4 macOS 10.14.6 Apple tvOS 12.4 watchOS 5.3 | i386 x86_64 armv7 armv7s armv7k arm64 arm64e arm64_32 | iOS 8-12.4 macOS 10.6-10.14.6 Apple tvOS 9-12.4 watchOS 2-5.3 | iOS 10.3.1-12.4 Apple tvOS 10.2-12.4 watchOS 3.2-5.3 | Swift 4 Swift 4.2 Swift 5 |
| Xcode 10.2.x | macOS Mojave 10.14.3 | iOS 12.2 macOS 10.14.4 Apple tvOS 12.2 watchOS 5.2 | i386 x86_64 armv7 armv7s armv7k arm64 arm64e arm64_32 | iOS 8-12.2 macOS 10.6-10.14.4 Apple tvOS 9-12.2 watchOS 2-5.2 | iOS 8.1-12.2 Apple tvOS 9-12.2 watchOS 2-5.2 | Swift 4 Swift 4.2 Swift 5 |
来源: https://developer.apple.com/cn/support/xcode/
格式化 json 文件
暂时未发现方法。
解决方法:在 vscode 导入 ios 工程,在 vscode 格式化完成然后在 xcode 改
Clang-Format 统一 Xcode 代码格式化规范
安装步骤:
1、安装 clang-format
brew install clang-format查看是否安装成功
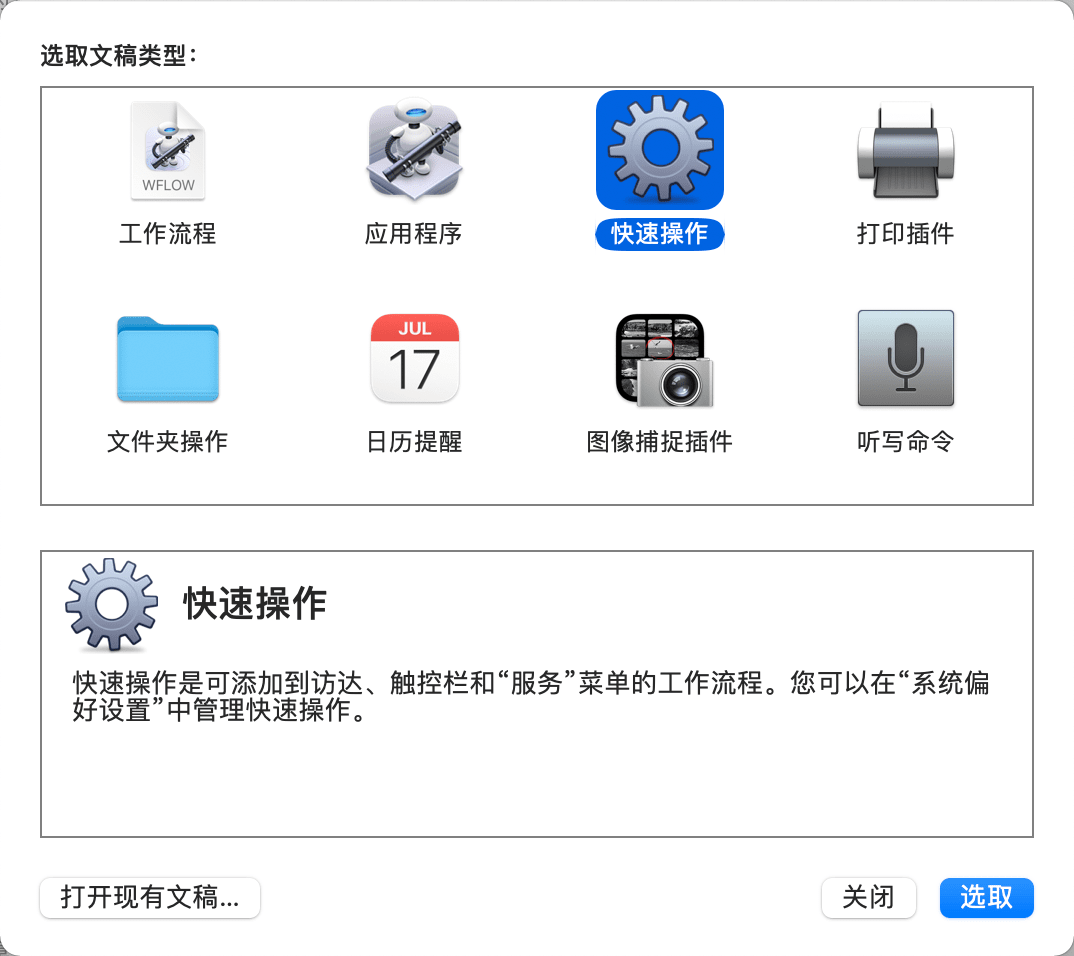
clang-format --version2、添加自动化服务
选择快速操作
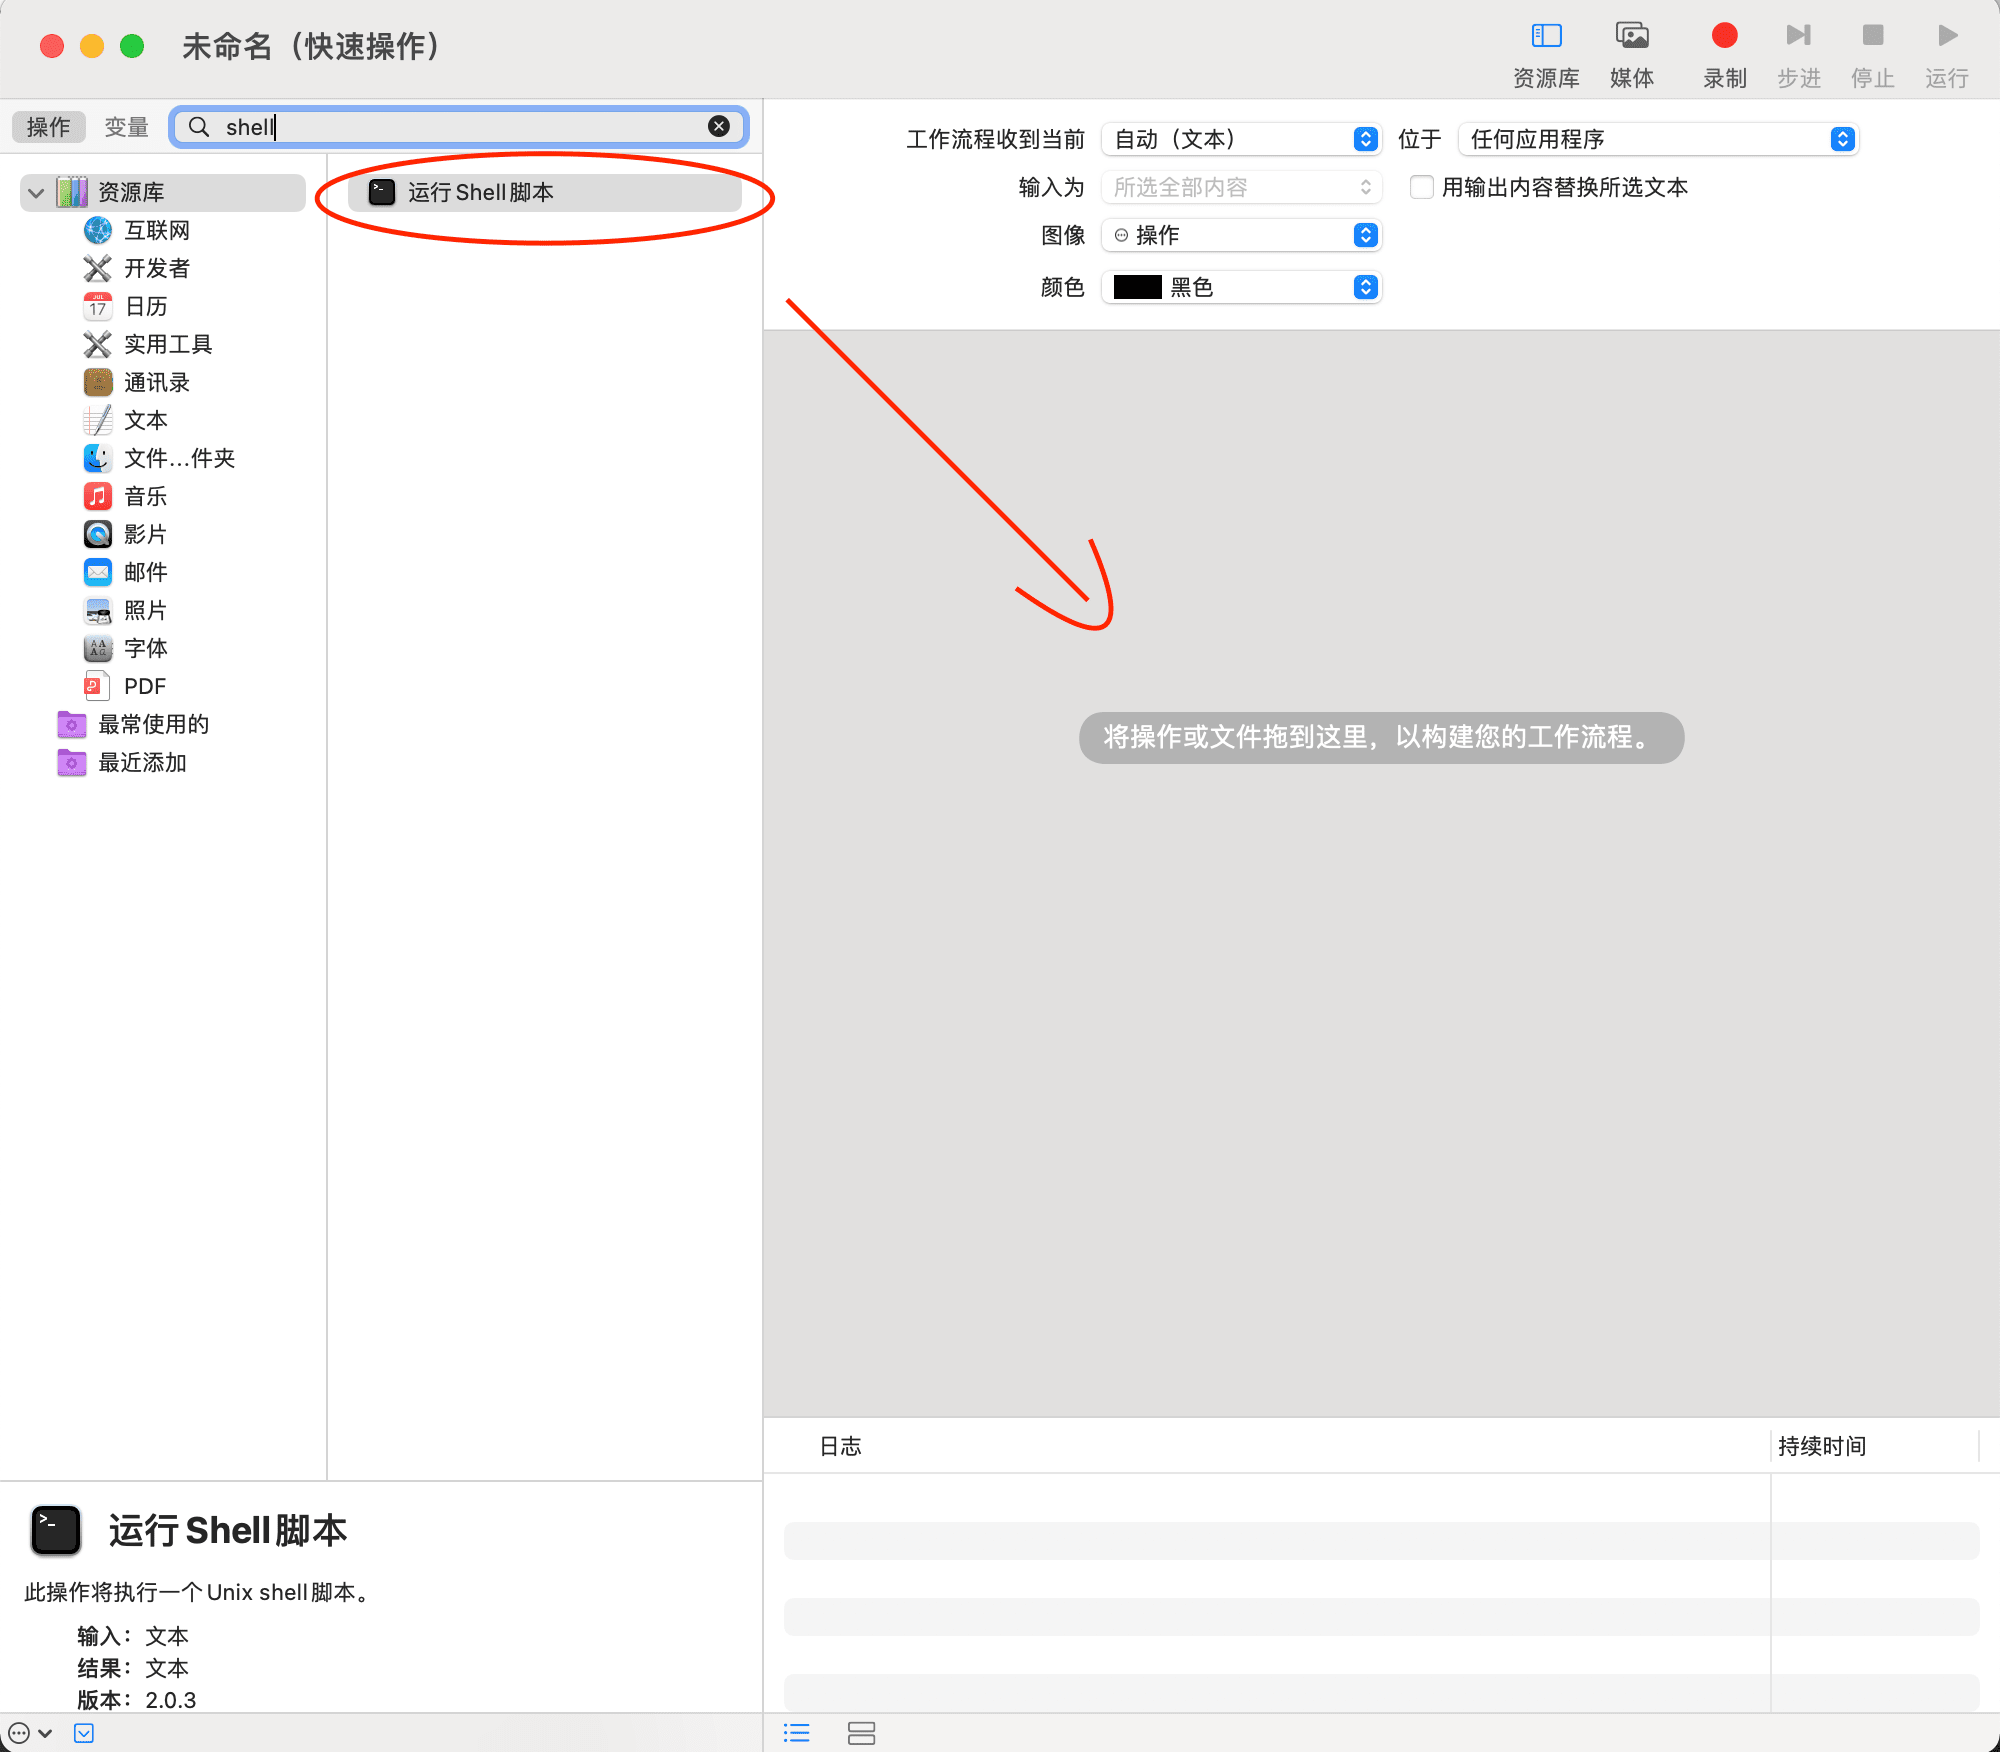
将 shell 拖拽到右侧
添加内容并勾选,保存并命名为CodeFormat
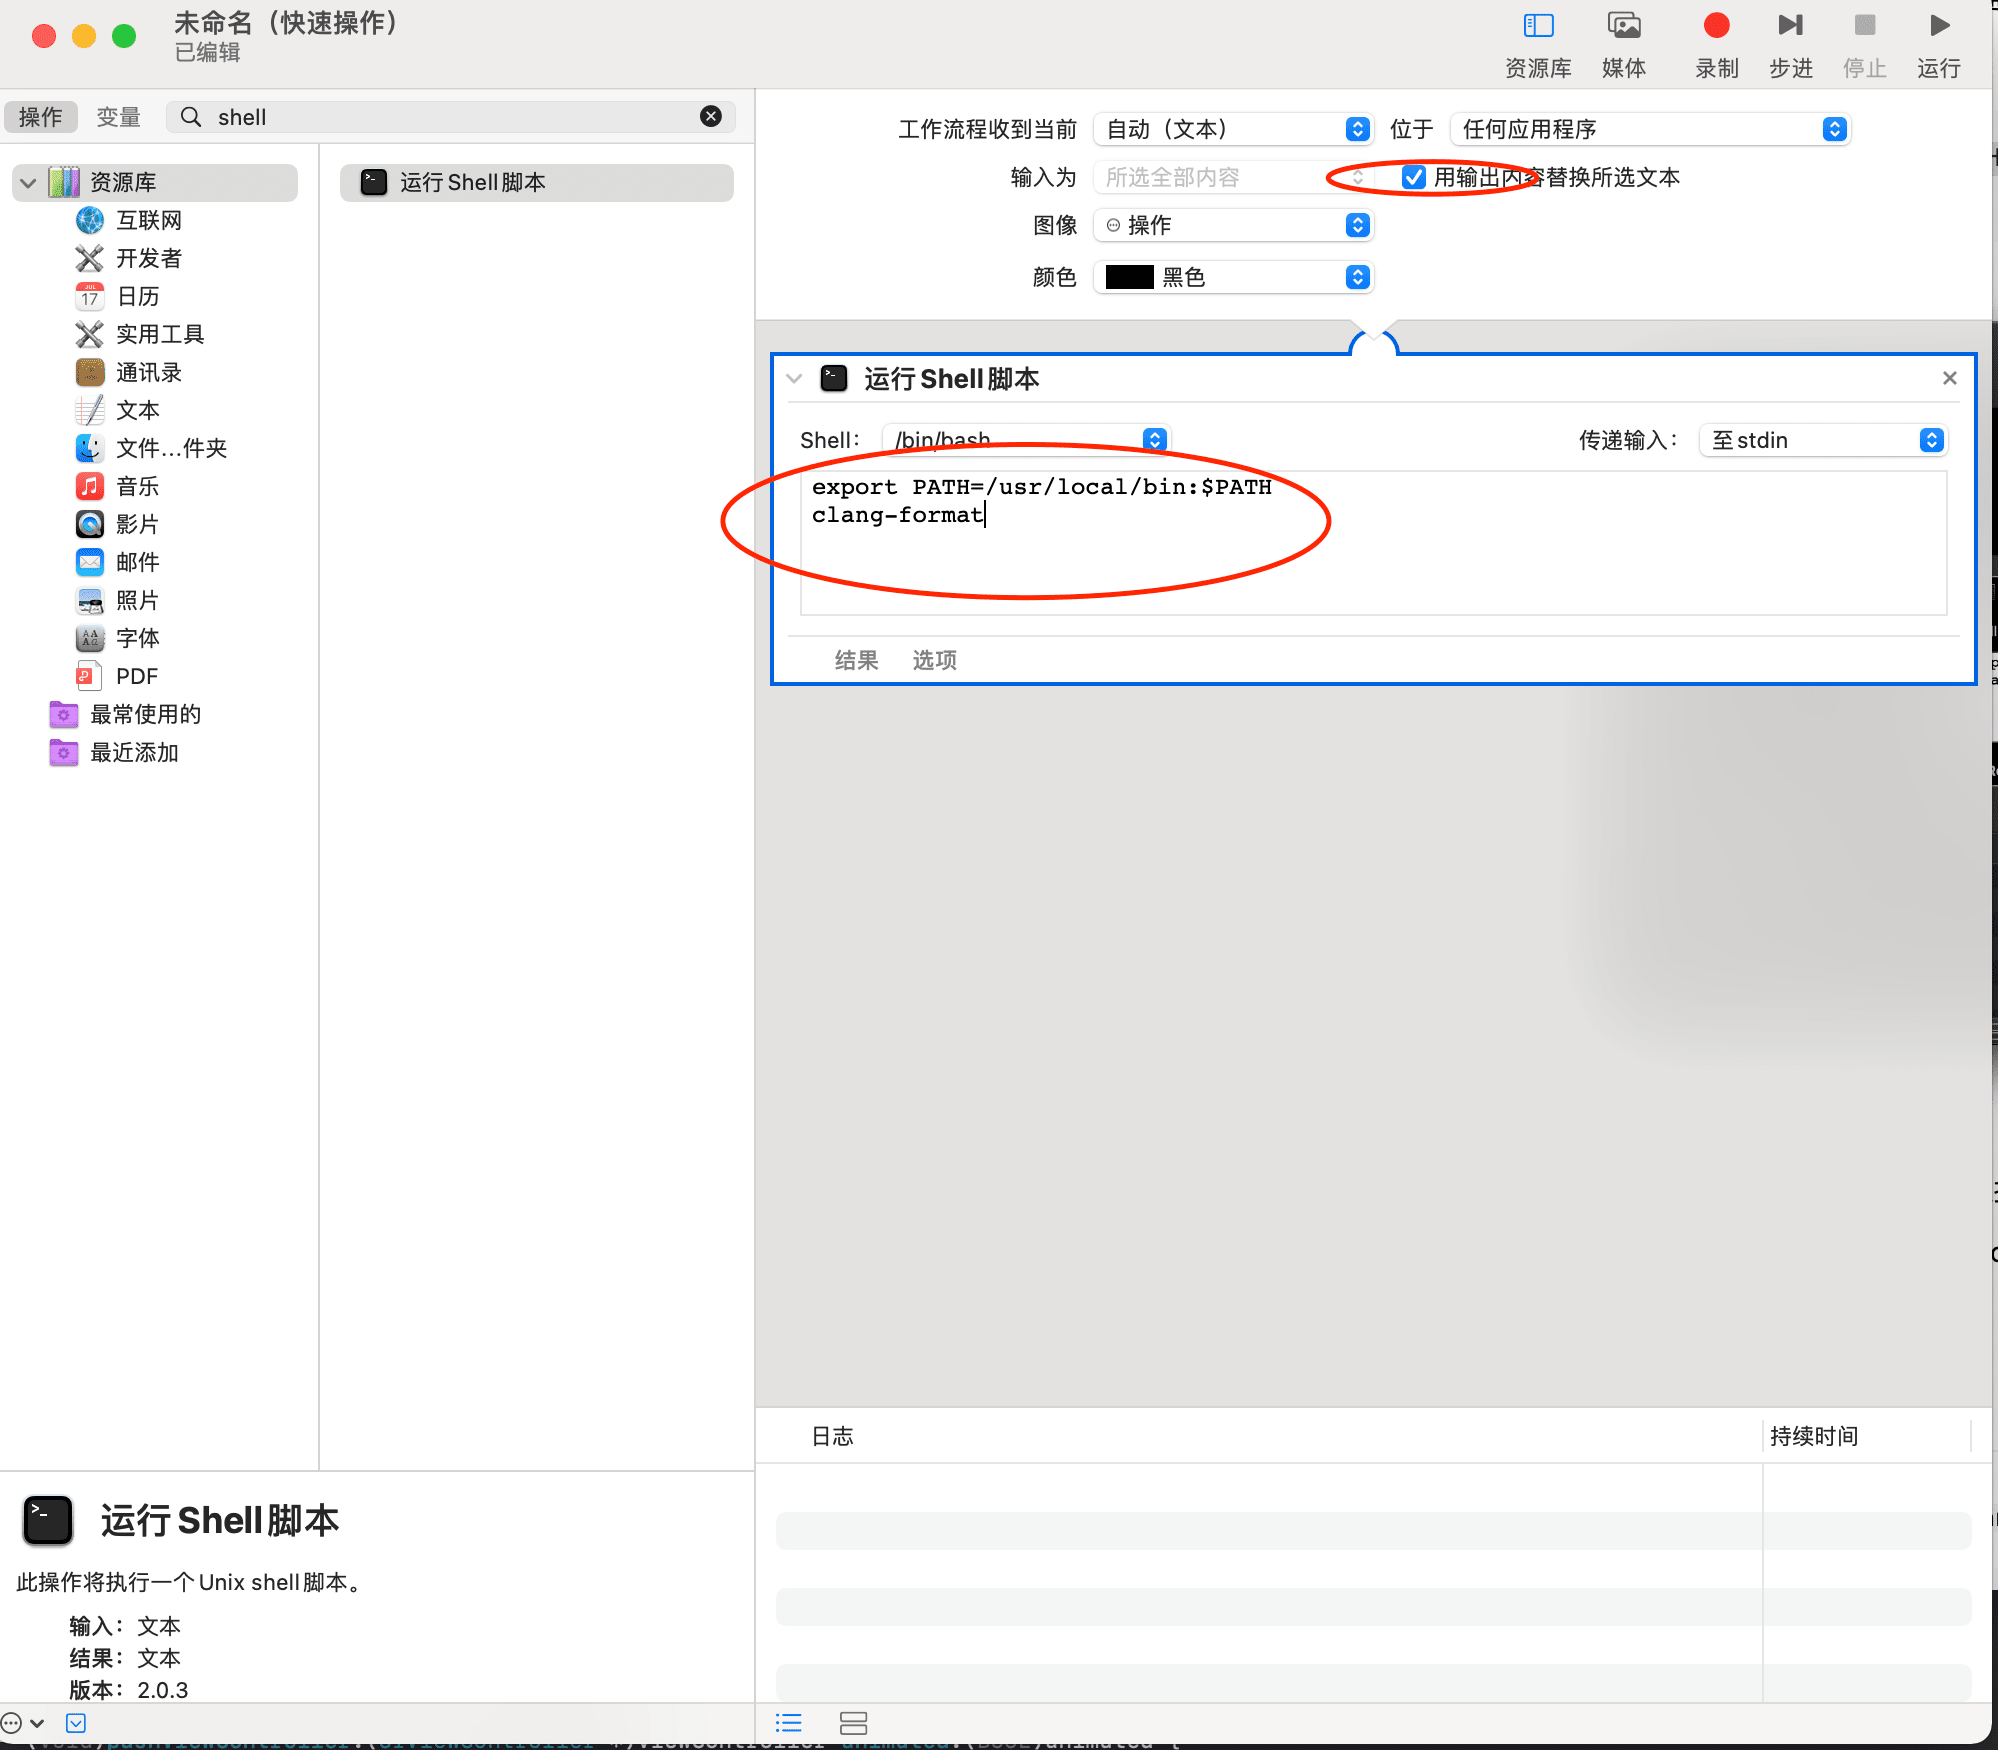
export PATH=/usr/local/bin:$PATH
clang-format
查看文件保存的位置:
open ~/Library/Services3、创建 .clang-format 文件并放到根目录
创建 .clang-format 文件:
touch .clang-format.clang-format 文件内容:
# 工具 https://github.com/mapbox/XcodeClangFormat(需要添加签名使用)
# 函数名详细地址 英文 http://clang.llvm.org/docs/ClangFormatStyleOptions.html
# 函数名详细地址 中文 https://www.cnblogs.com/PaulpauL/p/5929753.html

# OC语言
Language: ObjC

# 基于LLVM格式
# BasedOnStyle: LLVM

# 对齐注释
AlignTrailingComments: true

# 指针和引用的对齐方式
PointerAlignment: Right

# 用于缩进的列数
IndentWidth: 4

# 针对OC的block的缩进宽度
ObjCBlockIndentWidth: 4

# OC的block嵌套参数不换行
ObjCBreakBeforeNestedBlockParam: false

# switch的case缩进
IndentCaseLabels: true

# OC里面,在@property后加空格
ObjCSpaceAfterProperty: false

# 括号中的(),{},[]代码对齐方式
AlignAfterOpenBracket: Align

#ContinuationIndentWidth: 0

# 赋值=对齐
AlignConsecutiveAssignments: false

# 声明参数对齐
AlignConsecutiveDeclarations: false

# 运算符位置
BreakBeforeBinaryOperators: None

# 如果为真(true), 三元运算符将被放置在换行后
BreakBeforeTernaryOperators: false

# 总是在逗号和对齐逗号跟冒号前把构造函数初始化式换行
BreakConstructorInitializersBeforeComma: false

# 允许短的函数放在同一行
#AllowShortFunctionsOnASingleLine: None

# 允许case在同一行
AllowShortCaseLabelsOnASingleLine: false

# OC里面,在Protocol前后加空格
ObjCSpaceBeforeProtocolList: true

# 单行注释前的空格数
SpacesBeforeTrailingComments: 1

# 连续的空行保留几行
MaxEmptyLinesToKeep: 1

# 保留block里面的空行
KeepEmptyLinesAtTheStartOfBlocks: false

# 每行字符的限制,0表示没有限制
ColumnLimit: 0

# []中添加空格
SpacesInSquareBrackets: false

# ()中添加空格
SpacesInParentheses : false

# @[]里面两边空格,默认true
SpacesInContainerLiterals: false

# 赋值运算符前加空格
SpaceBeforeAssignmentOperators: true

# 在空括号中加空格
SpaceInEmptyParentheses: false

# 在<>中间插入空格
SpacesInAngles: false

# 换行的时候对齐操作符
AlignOperands: true

# 允许if在同一行
AllowShortIfStatementsOnASingleLine: true

# 允许while在同一行
AllowShortLoopsOnASingleLine: false

# 允许将简单的语句块放到同一行
AllowShortBlocksOnASingleLine: true

# 缩进函数名
IndentWrappedFunctionNames: false

# 形参 如果为false要么都在同一行,要么各有一行
BinPackParameters: false

# 实参 如果为false要么都在同一行,要么各有一行
BinPackArguments: false

# 大括号换行
BreakBeforeBraces: Custom
BraceWrapping:
  # class定义后面
  AfterClass: true
  # 控制语句后面
  AfterControlStatement: false
  # enum定义后面
  AfterEnum: false
  # 函数定义后面
  AfterFunction: false
  # 命名空间定义后面
  AfterNamespace: false
  # struct定义后面
  AfterStruct: false
  # union定义后面
  AfterUnion: false
  # catch之前
  BeforeCatch: false
打开根目录
open ~4、设置快捷键:系统偏好->键盘->快捷键->app 快捷键->选择 Xcode->设置快捷键按钮快捷键按钮建议设置: control+A ,系统格式化快捷键为: control+I 方便记忆
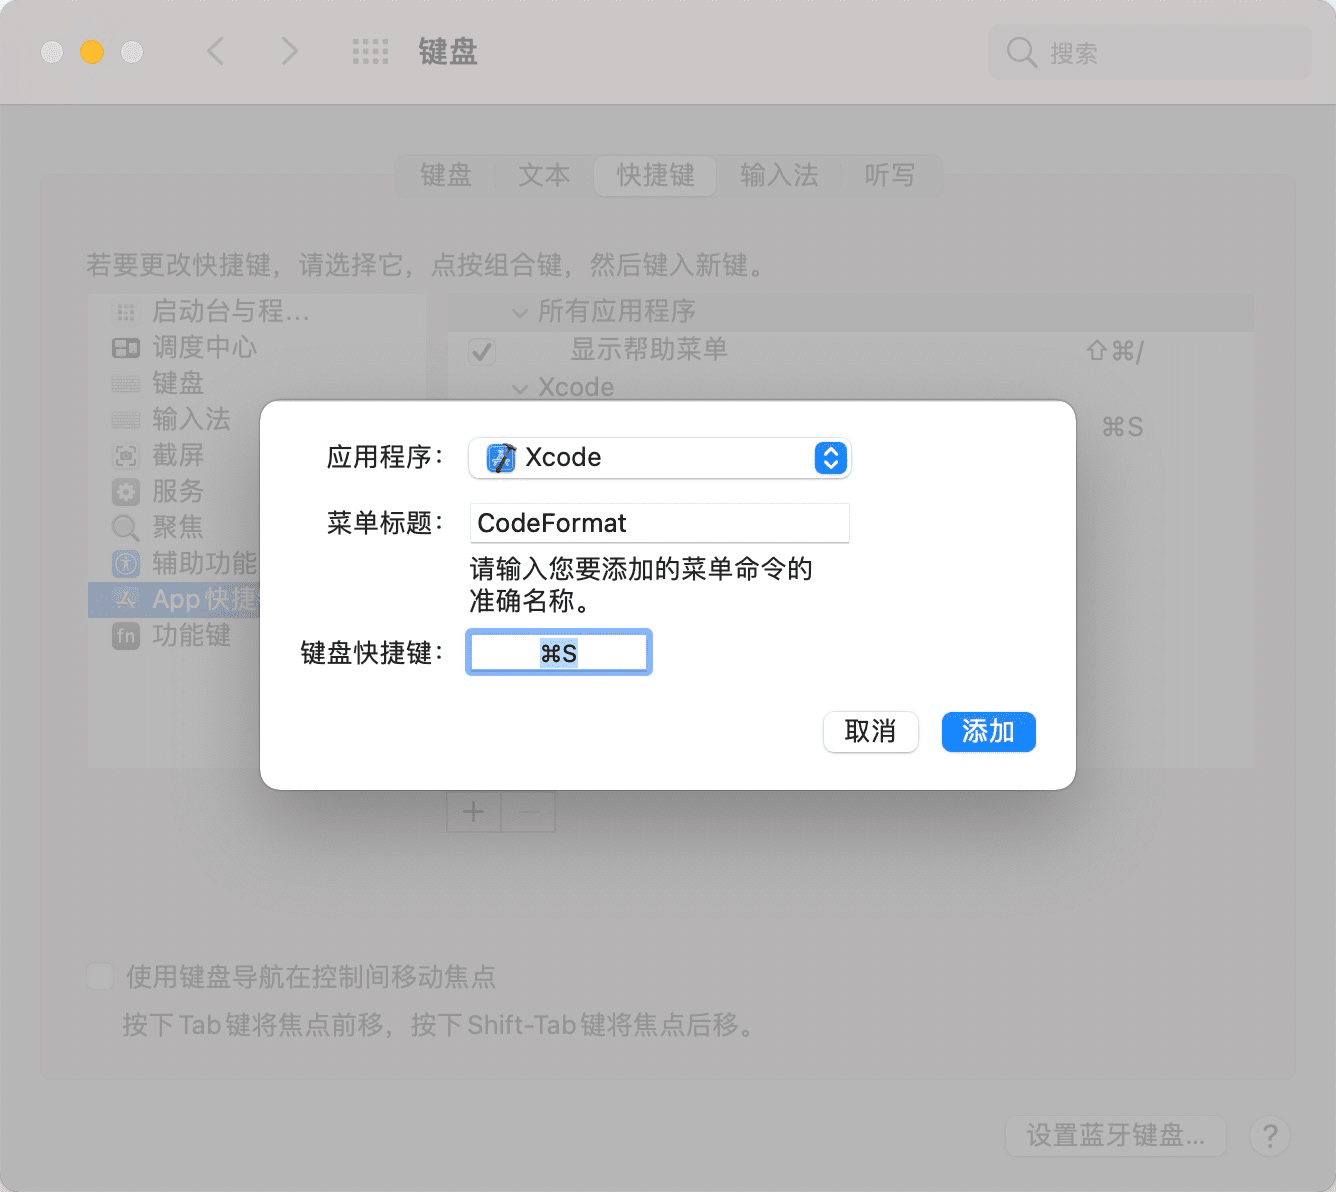
5、查看效果:
快捷键按钮方式:重新打开 Xcode->选中需要格式化的代码->按下之前设置的快捷键按钮手动选择方式:选中需要格式化的代码->右键->Services->CodeFormat 
可能出现的问题
1、clang-format, bash 命令未找到
需要修改 bash_profile 文件,添加运行路径。具体为 vim ~/.bash_profile, 在文件内添加 clang-format 存放路径,保存后退出。 source ~/.bash_profile
2、Swift 代码没法格式化
用来格式化 Swift 代码的命令行工具是 SwiftFormat,安装教程:Swift 代码自动格式化
TODO:
NS_OPTIONS类型的枚举不符合预期,目前是手动调整,不知道有没有可以直接配 .clang-format的方案。
预期效果:
typedef NS_OPTIONS(NSUInteger, UIBorderSideType) {
    UIBorderSideTypeAll    = 0,
    UIBorderSideTypeTop    = 1 << 0,
    UIBorderSideTypeLeft   = 1 << 1,
    UIBorderSideTypeRight  = 1 << 2,
    UIBorderSideTypeBottom = 1 << 3,
};
实际效果:
typedef NS_OPTIONS(NSUInteger, UIBorderSideType) {
    UIBorderSideTypeAll = 0,
    UIBorderSideTypeTop = 1 << 0,
    UIBorderSideTypeLeft = 1 << 1,
    UIBorderSideTypeRight = 1 << 2,
    UIBorderSideTypeBottom = 1 << 3,
};
参考:
Xcode 代码格式化 .clang-format 配置与使用_CCSH 的博客-CSDN 博客_xcode 代码格式化
clang format 官方文档自定义参数介绍(中英文) - PaulpauL - 博客园
Clang Format 在 Mac 上的安装与使用 - 掘金
移除 Xcode 安装 APP 产生的缓存文件
只要重新运行 Xcode 就一定会重新生成,而且会随着运行程序的增多,占用空间会越来越大。删除后在重新运行程序可能会稍微慢一点,建议定期清理。
- 按
Cmd + Shift + K或shift + cmd + alt + k进行清理,然后退出 Xcode。 - 删除缓存
rm -rf ~/Library/Developer/Xcode/DerivedData在终端中运行 - 打开项目,
re-build
移除 APP 打包的 ipa 历史版本
删除后不可恢复,文件夹是按照日期排列的,所以如果你不想全部删除,就只保留最新的几个版本就好了,个人建议全部删除。
~/Library/Developer/Xcode/Archives移除模拟器的缓存数据
模拟器的相关数据。每个版本的模拟器占用的内存空间大约为 10M 左右。每个文件夹里包含的就是一个特定系统版本的设备的数据。每个文件夹对应哪个设备可以在其下 device.plist 中查看。删除之后,如果立即运行程序会报错,先关闭 Xcode,再重新打开程序,运行即可。运行该路径下会立马生成模拟器对应版本的文件。
~/Library/Developer/CoreSimulator/Devices/移除对旧设备的支持
一般是占用内存空间最大的文件夹,即使全部删,再连接设备调试时,会重新自动生成。一般 iOS 只向下兼容两个版本就可以了,所以我移除了 9.0 以下的所有版本。
~/Library/Developer/Xcode/iOS DeviceSupport移除 Xcode 中的无效的插件
因为之前你可能安装了一些 Xcode 的插件,比如 HighlightSelectedString、VVDocumenter-Xcode 等非常方便好用的第三方插件,在 Xcode 升级到 version 8.0 以后,就失效了,Xcode 在内部已经集成了类似的方法,所以之前安装的也都没有用了,但是还在原来的位置占用着内存空间,建议删除。
~/Library/Application Support/Developer/Shared/Xcode/Plug-ins移除旧版本的模拟器支持
如果你不小心安装了很多个版本的模拟器,那么你可以删除一些旧版本的。但是当你需要旧版本的模拟器时,就需要重新下载了。建议留下 1~2 个版本就好了,其余的都删了吧。
~/Library/Developer/CoreSimulator/Profiles/Runtimes/移除 playground 的项目缓存
删除后可重新生成,可以全部删除。再次运行程序会缓存。
~/Library/Developer/XCPGDevices/移除旧的文档
删除后不可恢复,该目录下存储的为开发文档,一般有三个文件 com.apple.adc.documentation.iOS.docset(1.68GB)、com.apple.adc.documentation.OSX.docset(2.62GB)和 com.apple.adc.documentation.Xcode.docset(256.4M),如果你只做 iOS 开发,其实你可以把 OSX.docset 删除掉的,因为它占用了 2.62GB 的内存。
~/Library/Developer/Shared/Documentation/DocSets移除模拟器中的 SDK 版本
不可恢复,操作请慎重。我个人的此路径下的只有最新版本的 sdk,除非当你有多个版本的 sdk 再酌情删除。
~/application/Xcode.app/Contents/Developer/Platforms/iPhoneSimulator.platform/Developer/SDKs/iOS 证书(.p12)和描述文件(.mobileprovision)申请
iOS 有两种证书和描述文件:
| 证书类型 | 使用场景 |
|---|---|
| 开发(Development)证书和描述文件 | 用于开发测试,在 HBuilderX 中打包后可在真机环境通过Safari 调试 |
| 发布(Distribution)证书和描述文件 | 用于提交 AppStore,在 HBuilderX 中提交云打包后提交到 AppStore 审核发布 |
准备环境
- 必需要有苹果开发者账号,并且加入了 “iOS Developer Program”
- Mac OS 10.9 以上系统(如果已经申请 p12 证书则不需要)
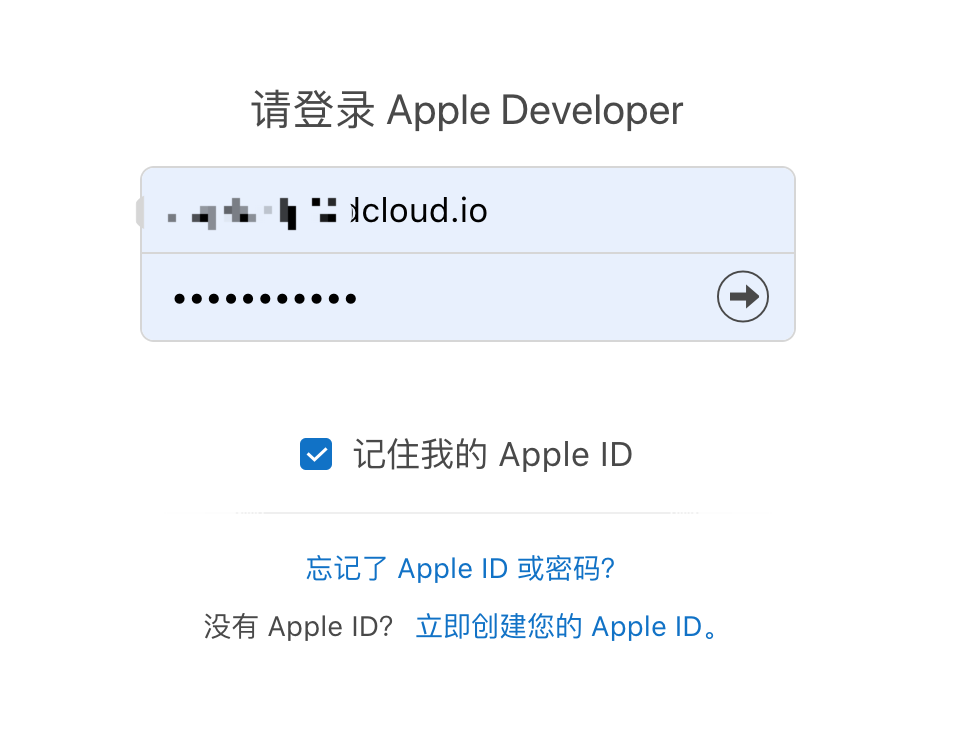
登录 iOS Dev Center
打开网站 iOS Dev Center 使用苹果开发者账号登录 iOS Dev Center:
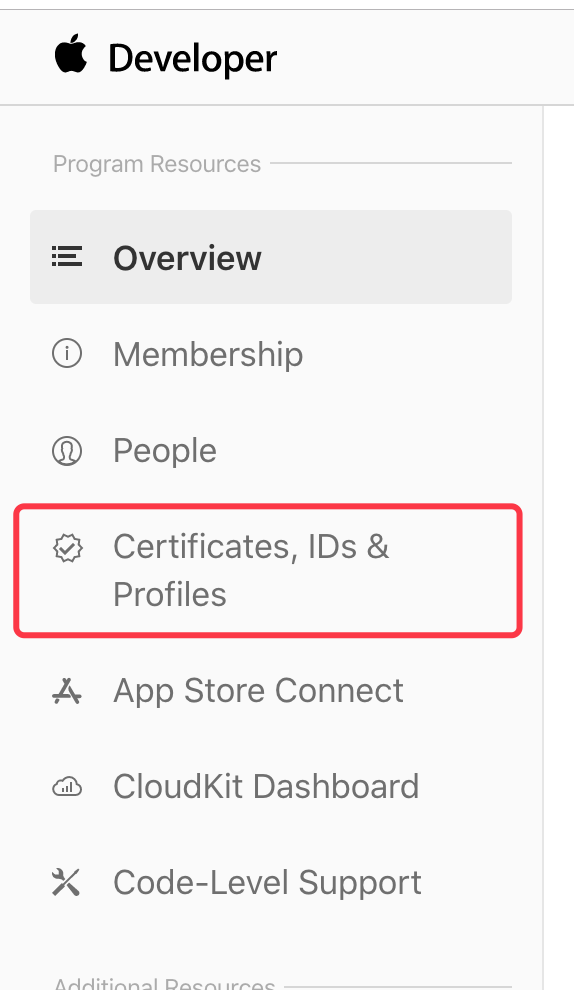
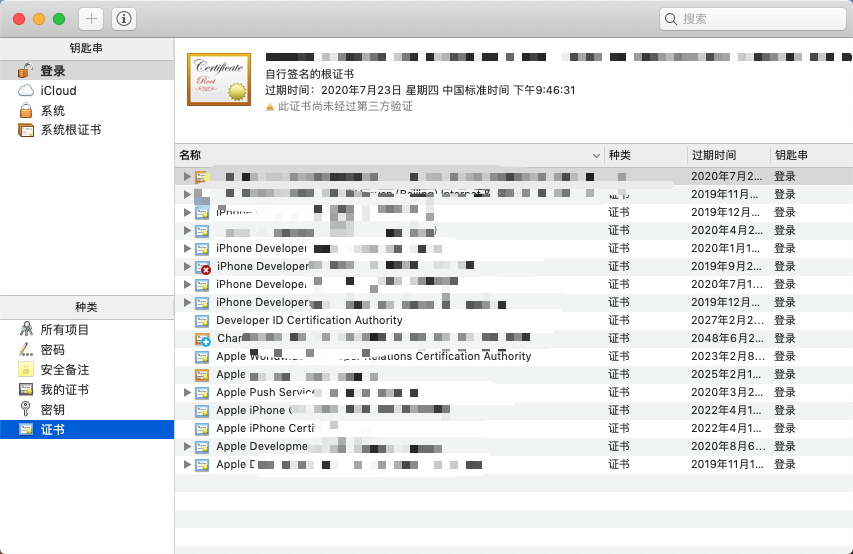
登录成功后在页面左侧选择 “Certificates,IDs & Profiles” 进入证书管理页面:
在证书管理页面,可以看到所有已经申请的证书及描述文件:
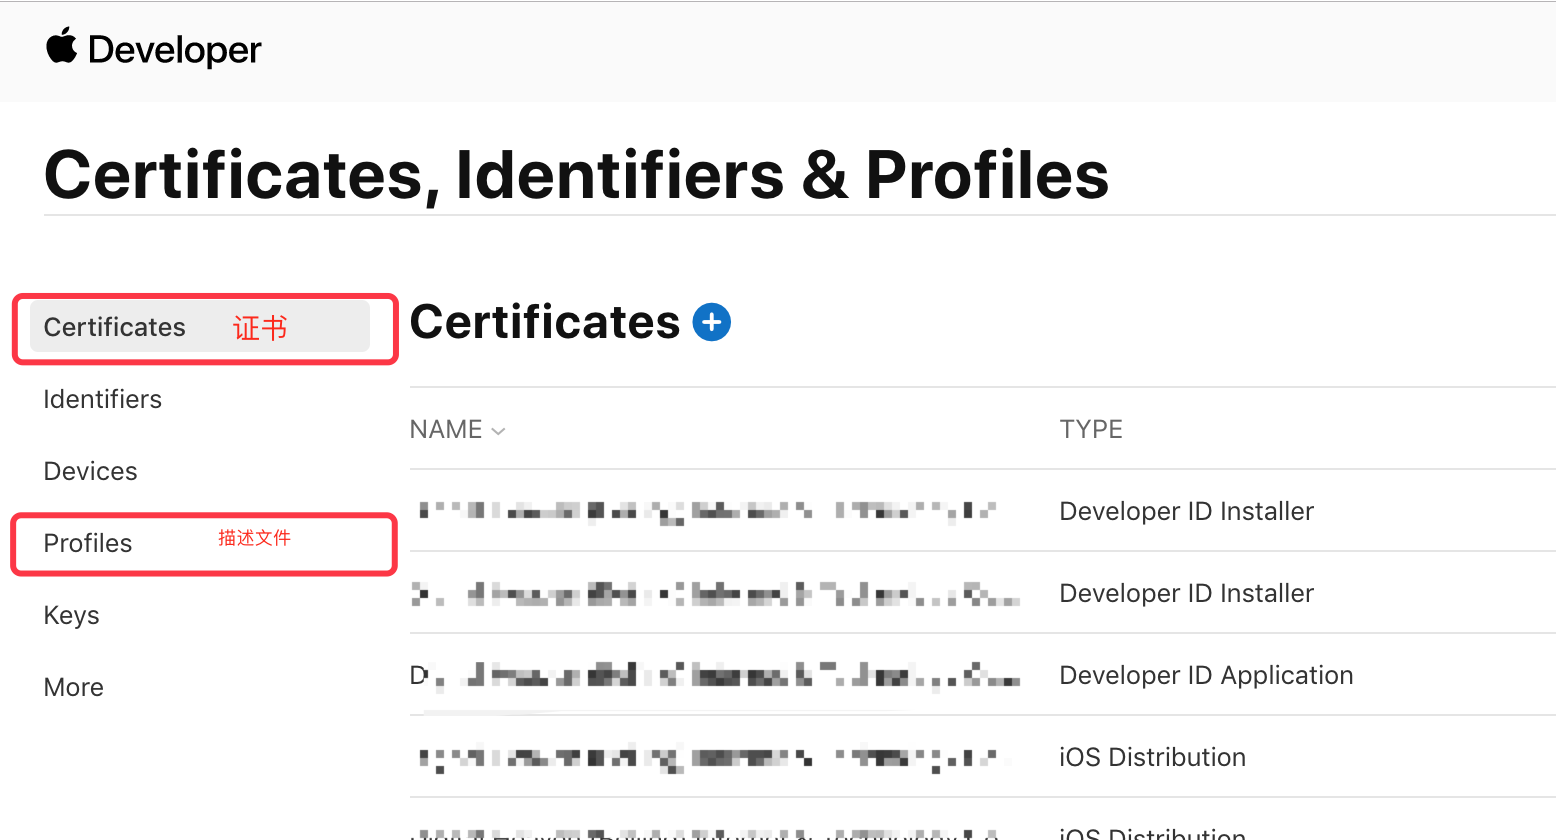
下面我们从头开始学习一下如何申请开发证书、发布证书及相对应的描述文件。
首先需要申请苹果 App ID (App 的唯一标识)
如果已经申请,可跳过此节
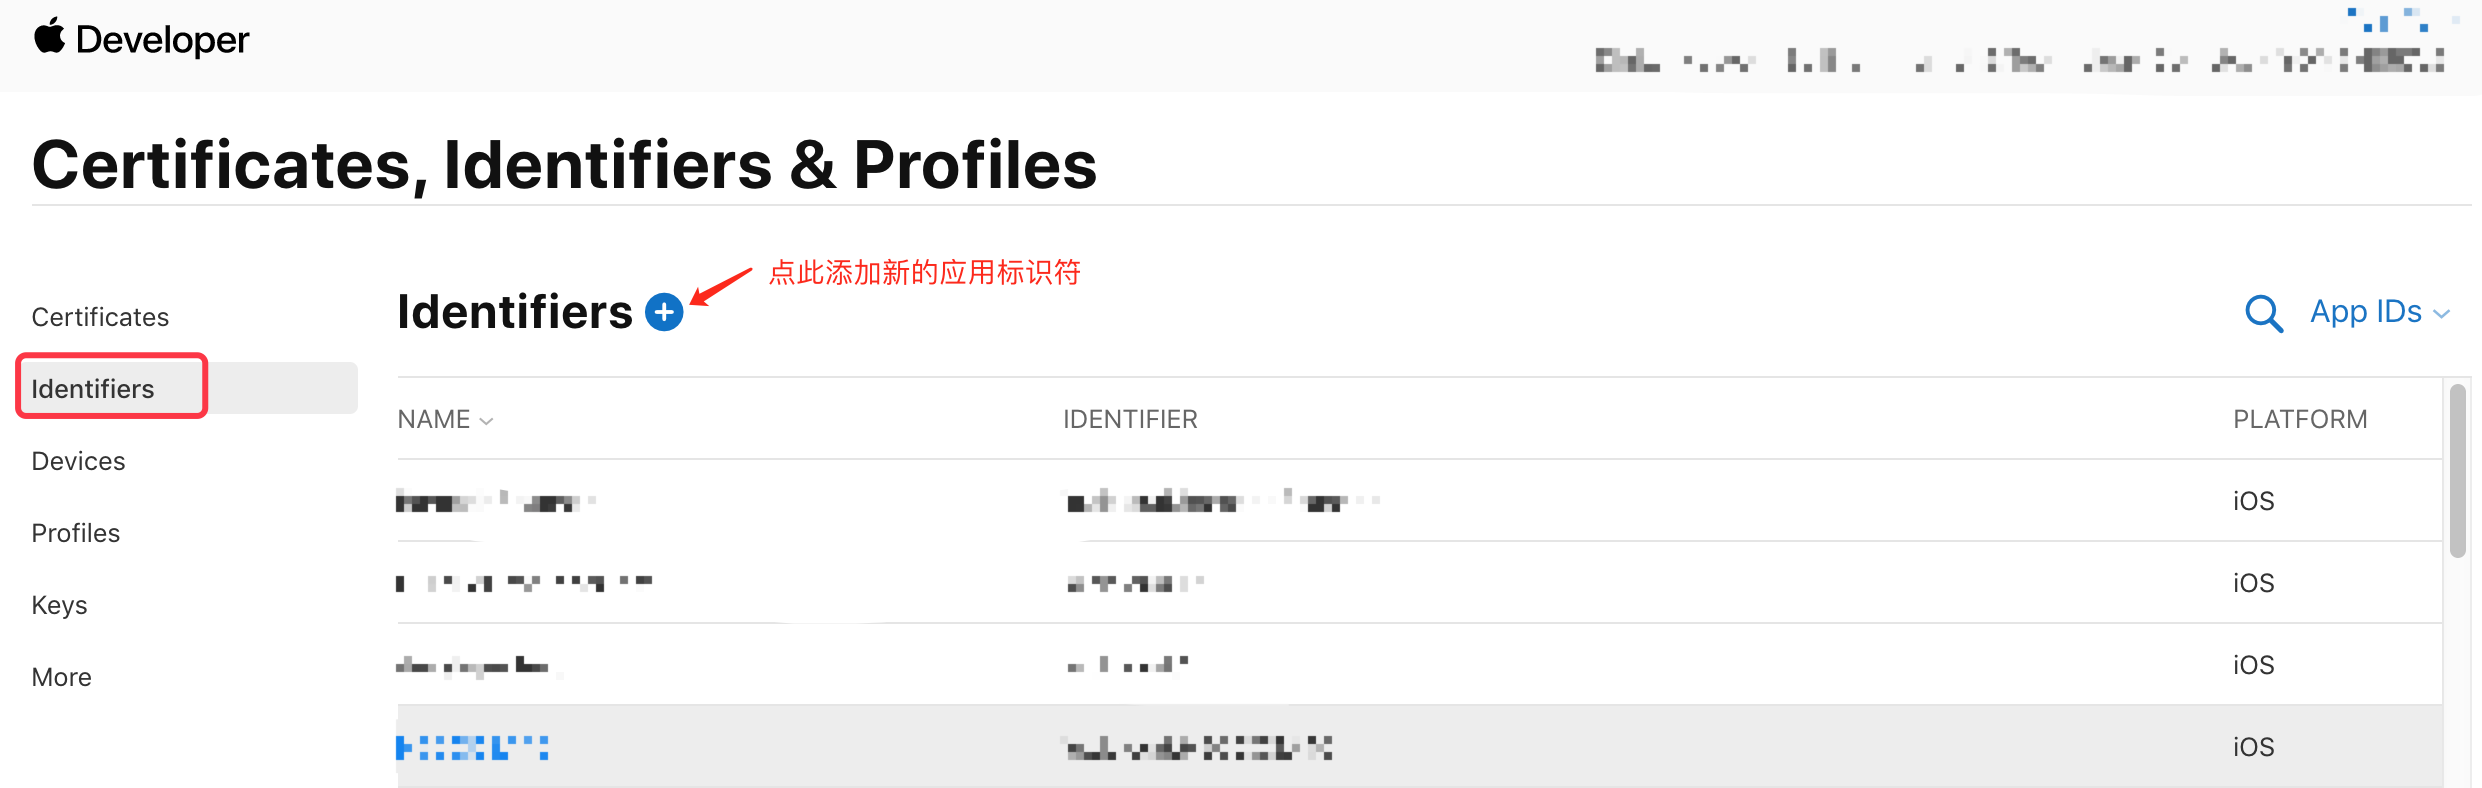
选择页面的 “Identifiers" 可查看到已申请的所有 App 应用标识,点击页面上的加号来创建一个新的应用标识:
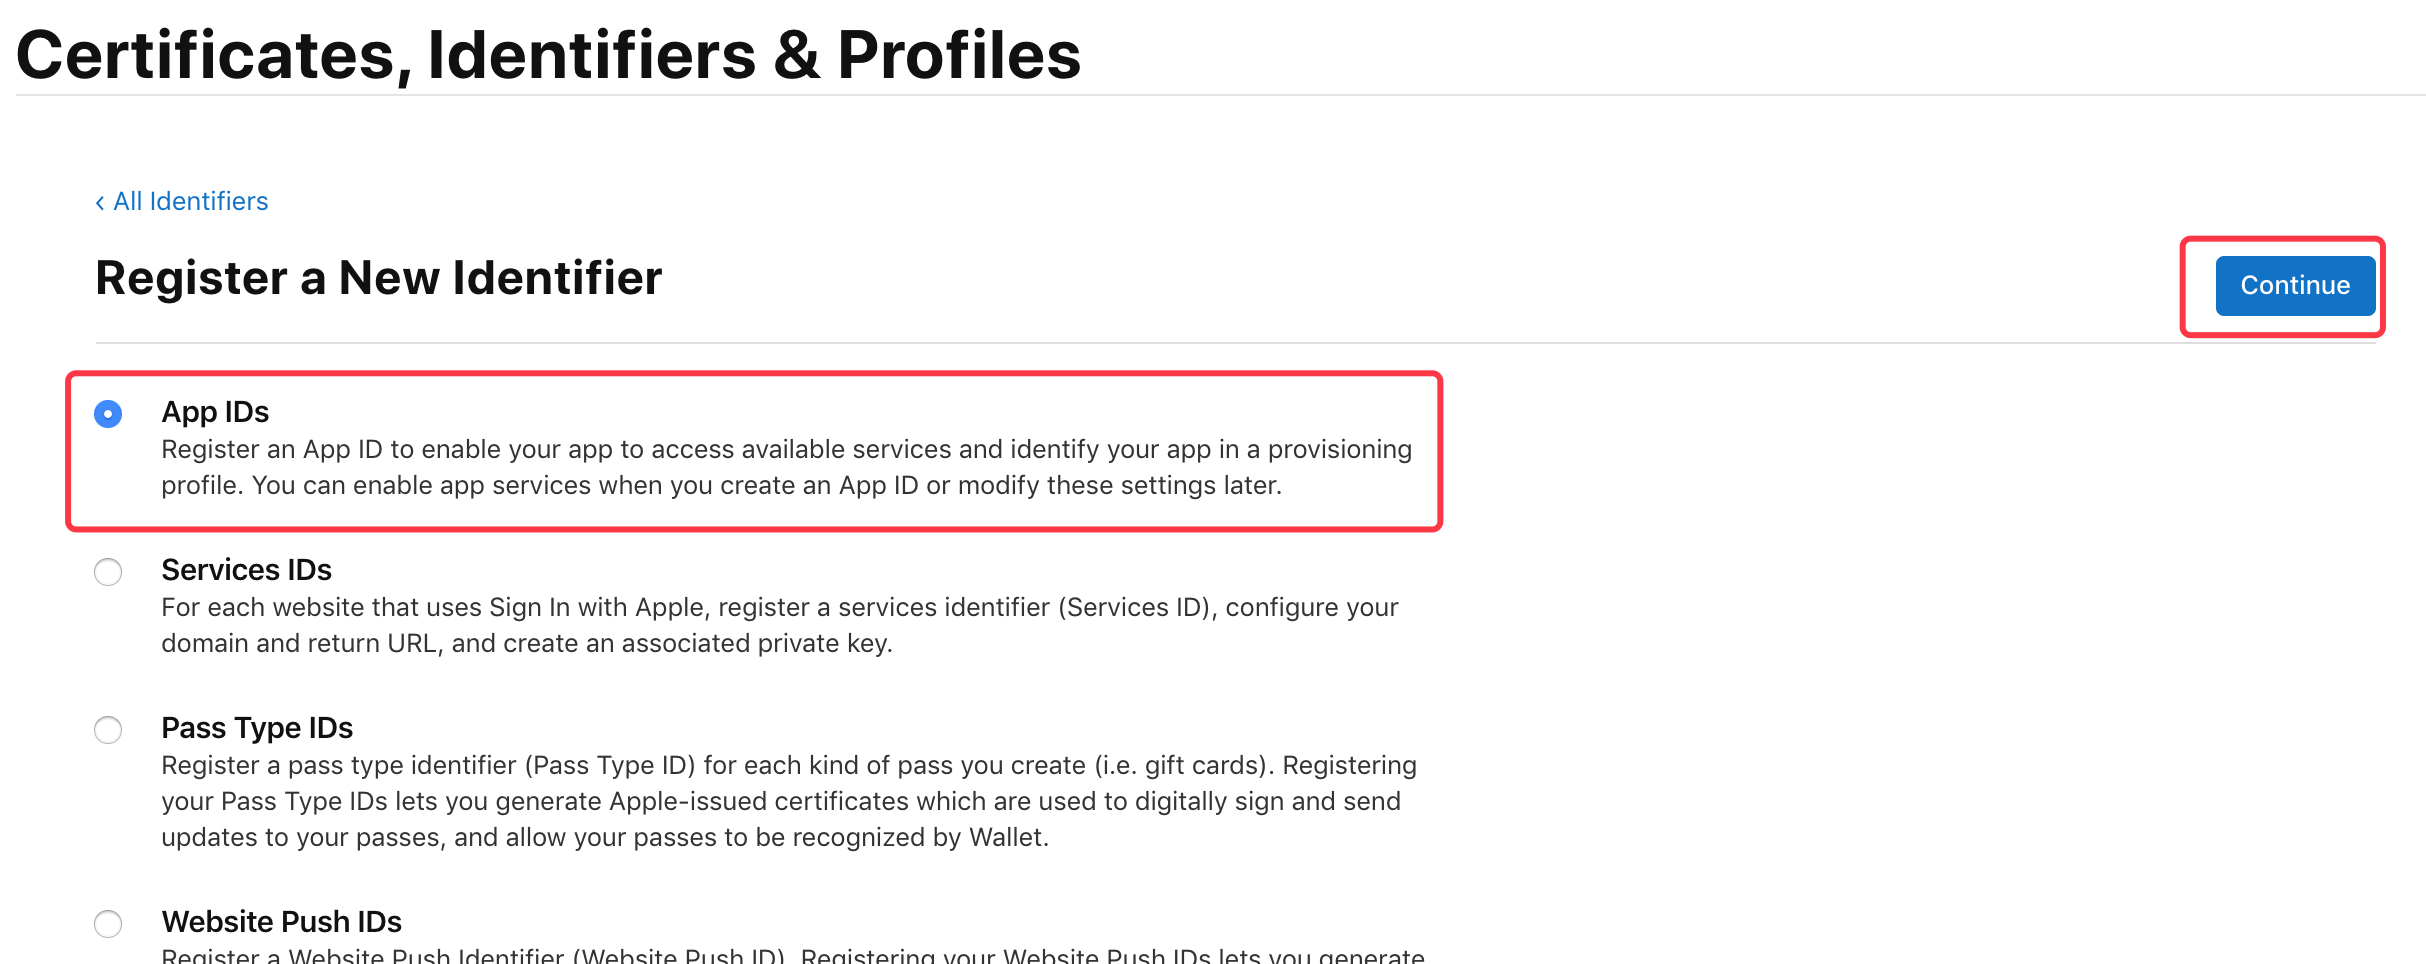
选择标识类型为 “App IDs”,然后点击 “Continue”
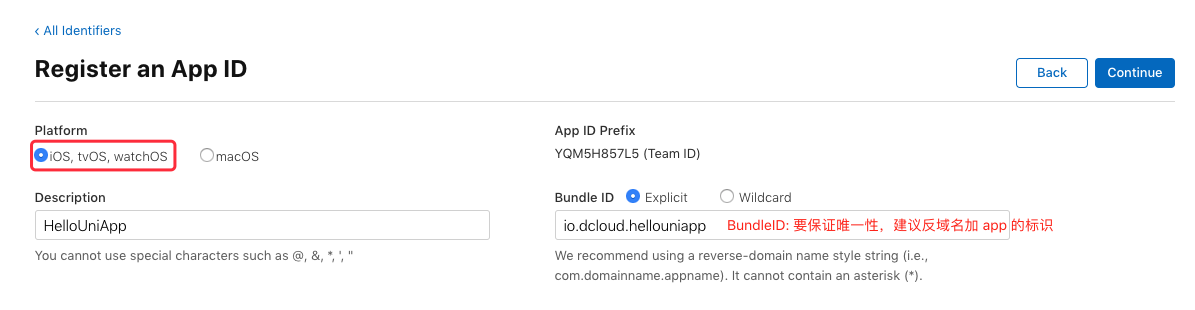
平台选择 “iOS,tvOS,watchOS”,Bundle ID 选择 “Explicit”,在 Description 中填写描述,然后填写 Bundle ID,Bundle ID 要保持唯一性,建议填写反域名加应用标识的格式 如:“io.dcloud.hellouniapp”, 然后点击 “Continue” 注意:在 HBuilderX 中 App 提交云端打包时界面上的 AppID 栏填写的就是这个 Bundle ID
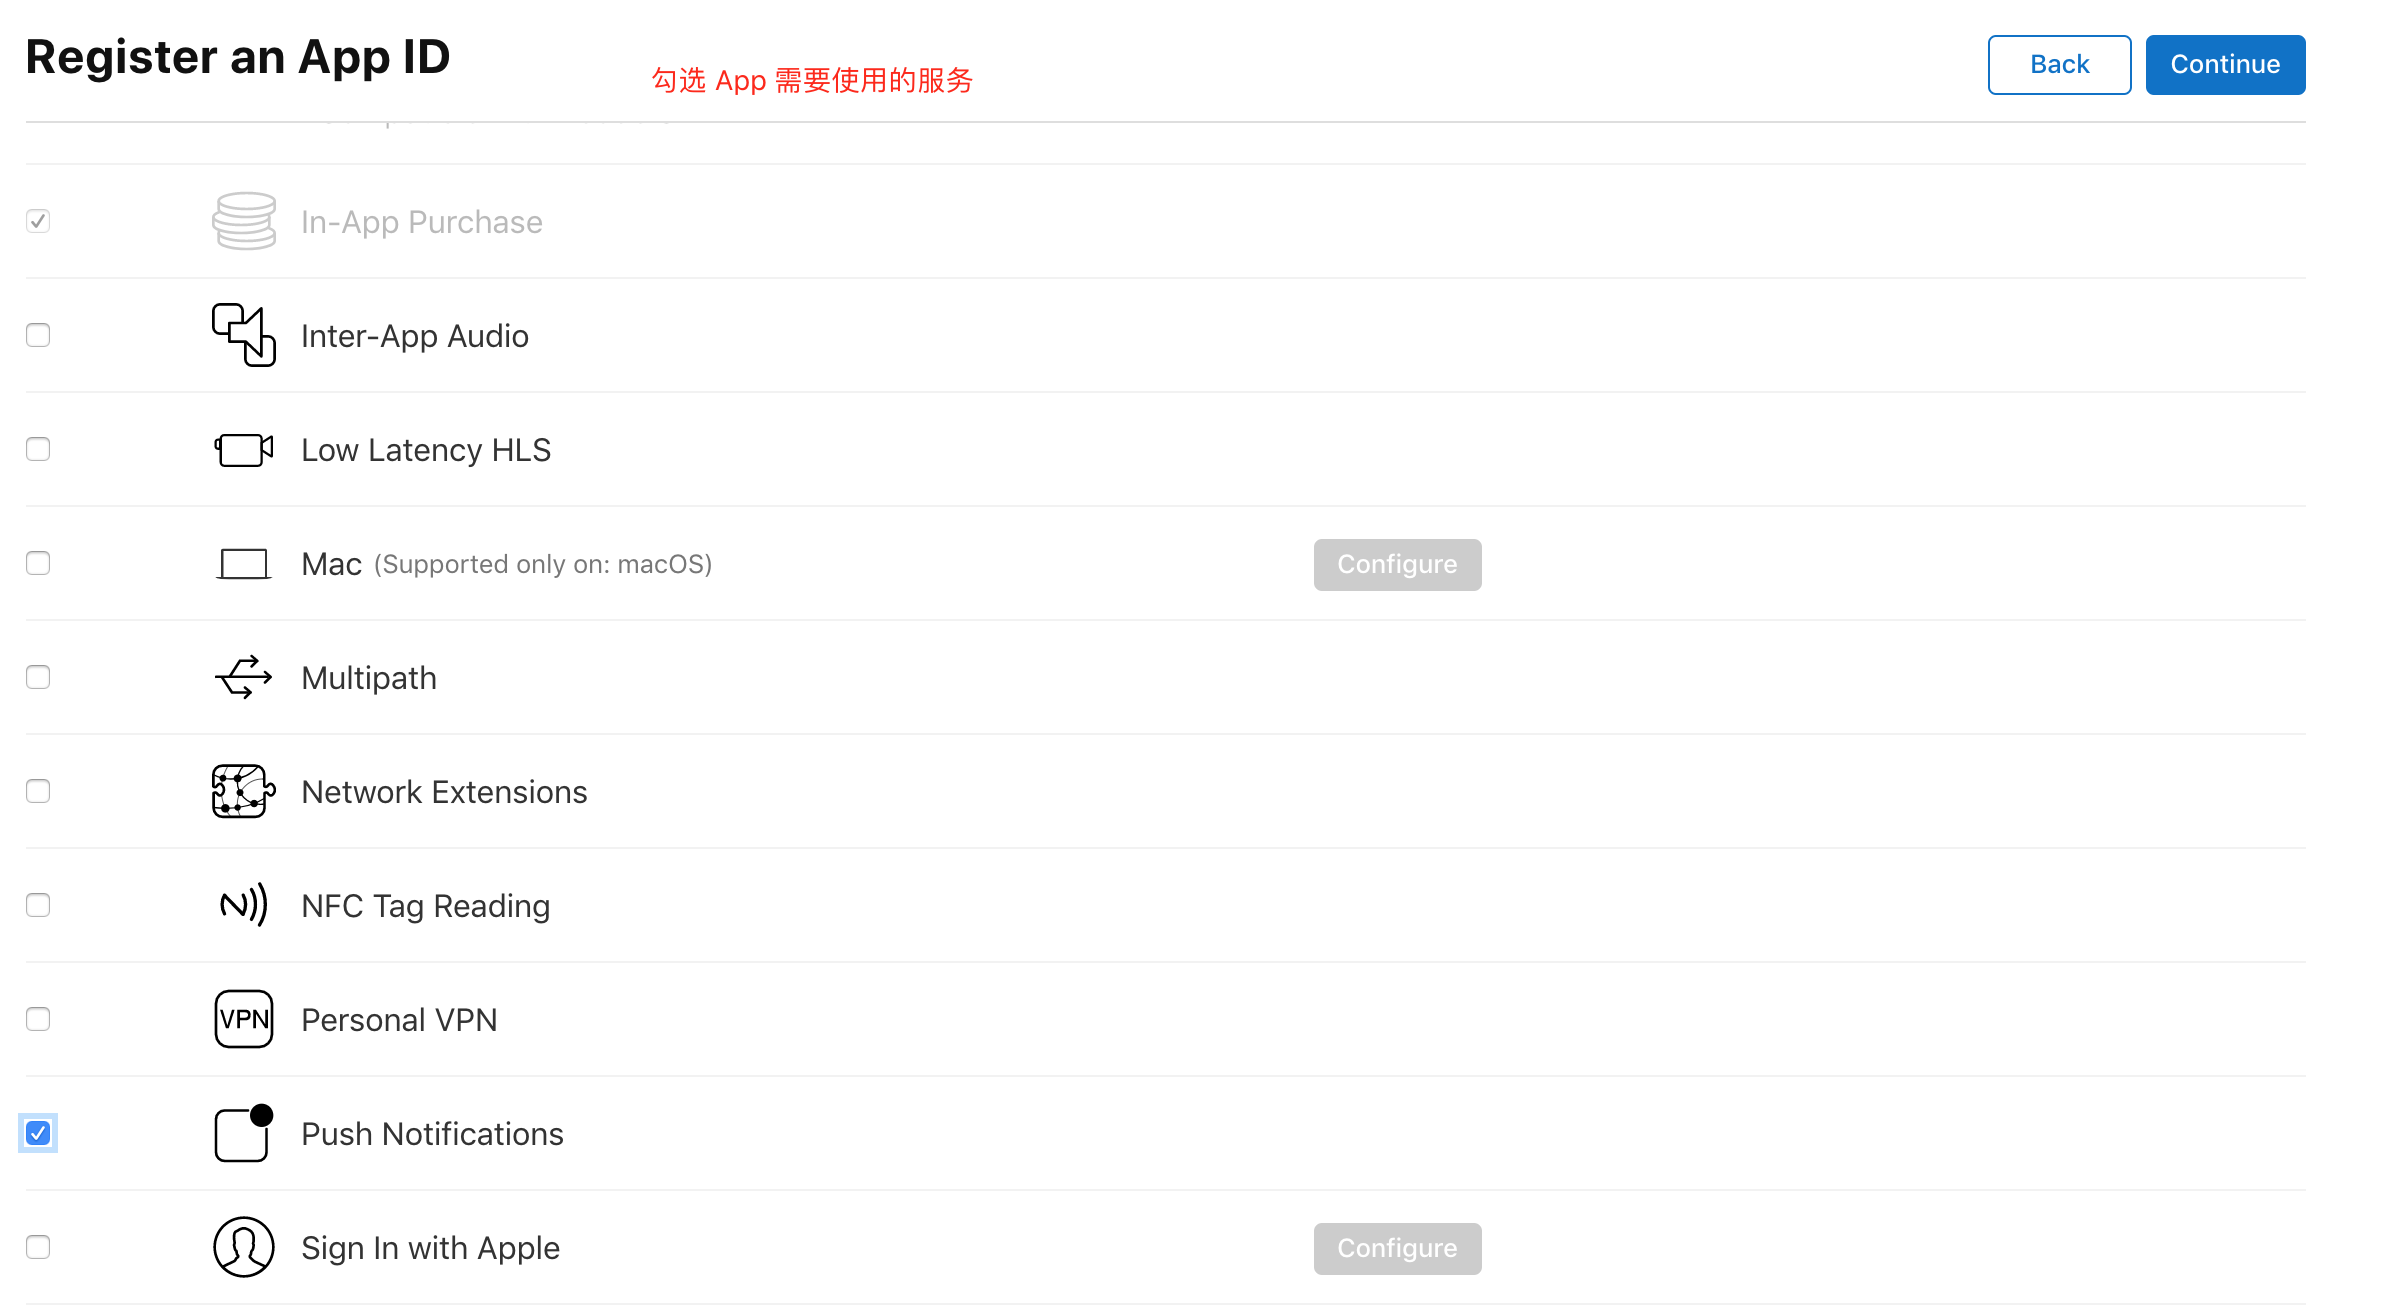
接下来需要选择应用需要使用的服务(如需要使用到消息推送功能,则选择“Push Notifications”),然后点击 “Continue” 注意:如果 App 用不到的服务一定不要勾选,以免响应审核
确认后选择提交,回到 identifiers 页面即可看到刚创建的 App ID:

至此,App ID 已经创建完毕,接下来开始创建开发证书,在创建开发证书前,需要先生成证书请求文件
生成证书请求文件
不管是申请开发 (Development) 证书还是发布 (Distribution) 证书,都需要使用证书请求 (.certSigningRequest) 文件,证书请求文件需在 Mac OS 上使用 “钥匙串访问” 工具生成。
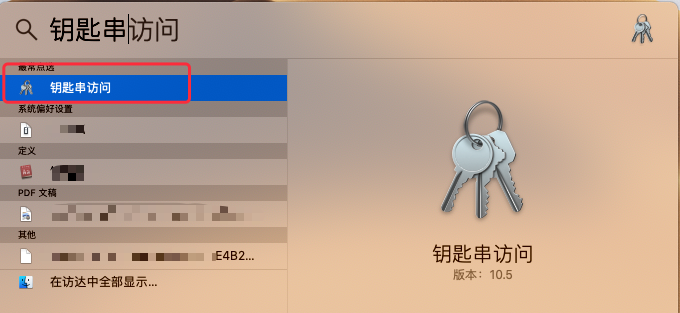
在“Spltlight Search”中搜索“钥匙串”并打开 “钥匙串访问” 工具:
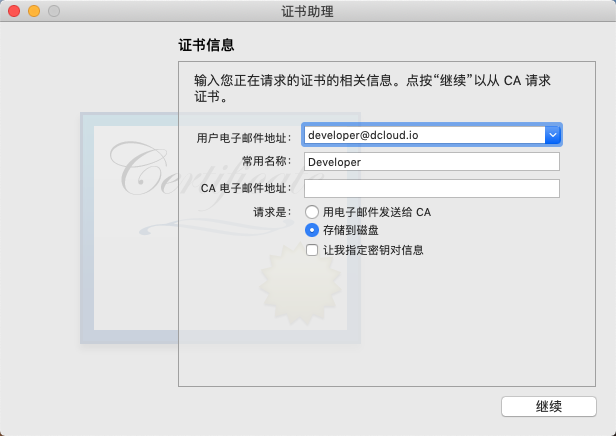
打开菜单 “钥匙串访问”->“证书助理”,选择“从证书颁发机构请求证书...”:

打开创建请求证书页面,在页面中输入用户邮件地址、常用名称,选择存储到磁盘,点击 “继续” :
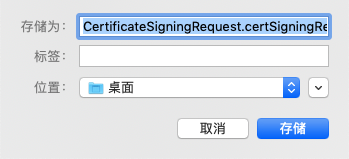
文件名称为“CertificateSigningRequest.certSigningRequest”,选择保存位置,点击 “存储” 将证书请求文件保存到指定路径下,后面申请开发(Development)证书和发布(Production)证书时需要用到
申请开发(Development)证书和描述文件
开发(Development)证书及对应的描述文件用于开发阶段使用,可以直接将 App 安装到手机上,一个描述文件最多绑定 100 台测试设备(开发证书不能用于发布应用到 App Store)。
申请开发(Development)证书
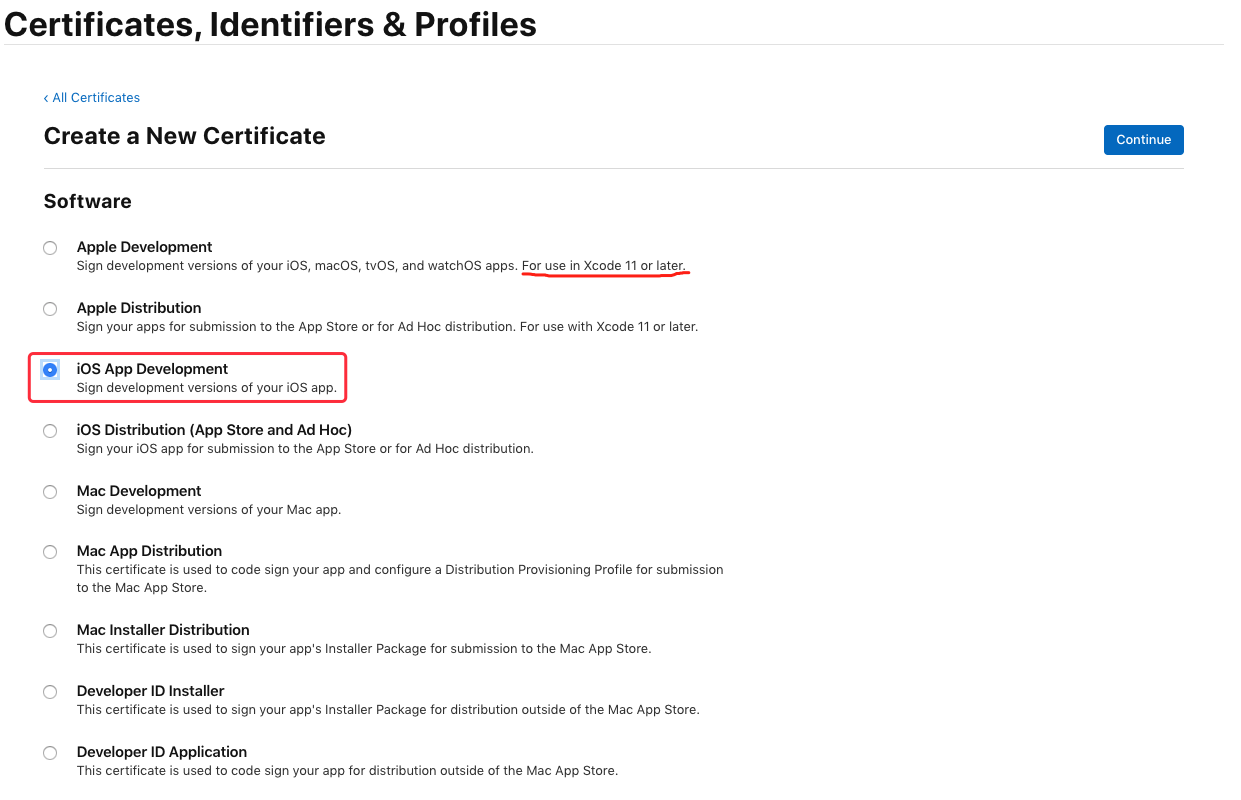
在证书管理页面选择 “Certificates" 可查看到已申请的所有证书(TYPE:Development 为开发证书,Distribution 为发布证书),点击页面的加号来创建一个新的证书:

在 “Software” 栏下选中 “iOS App Development” 然后点击 “Continue”:
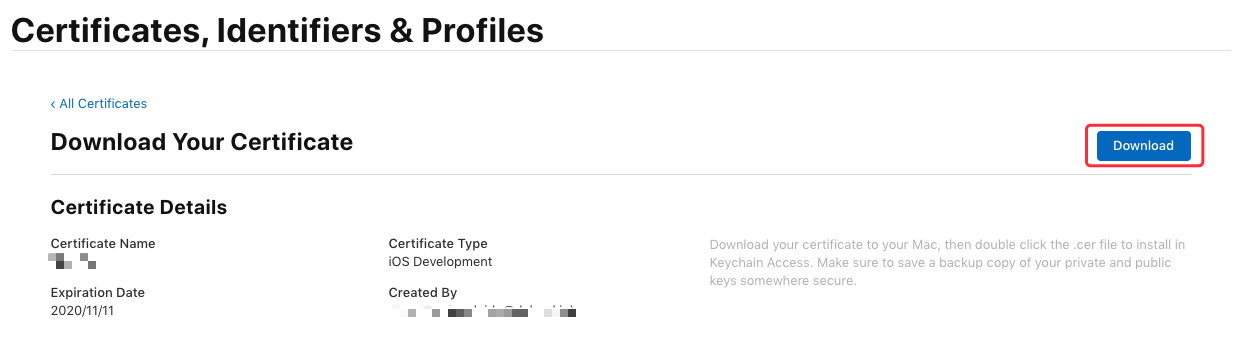
接下来需要用到刚刚生成的证书请求文件,点击“Choose File...”选择刚刚保存到本地的 “CertificateSigningRequest.certSigningRequest”文件,点击 “Continue” 生成证书文件:

生成证书后选择 “Download” 将证书下到本地 (ios_development.cer):
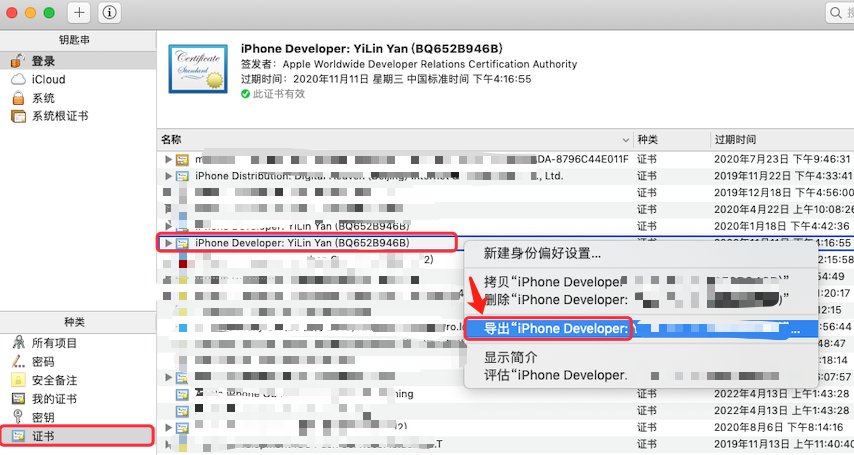
双击保存到本地的 ios_development.cer 文件,会自动打开 “钥匙串访问” 工具说明导入证书成功,可以在证书列表中看到刚刚导入的证书,接下来需要导出 .p12 证书文件,选中导入的证书,右键选择 “导出...”:
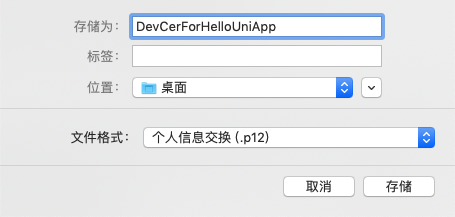
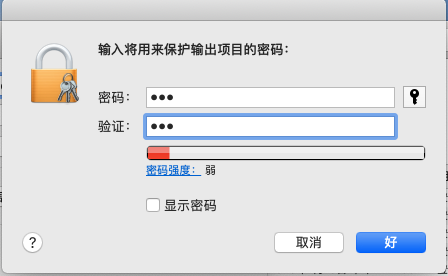
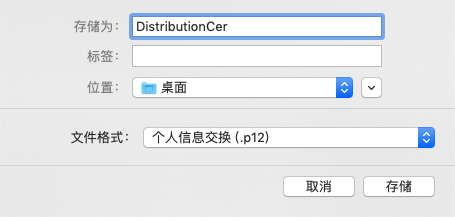
输入文件名、选择路径后点击 “存储”:
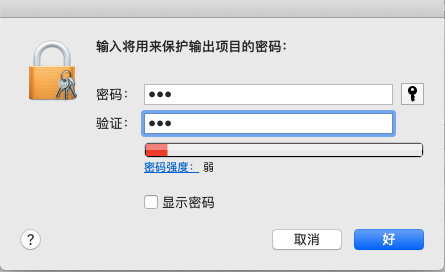
输入密码及确认密码后点击 “好”:
至此,我们已经完成了开发证书的制作(得到了 xxx.p12 证书文件),接下来,继续生成开发阶段所需的描述文件,在生成描述文件之前,需要先添加调试设备(iPhone 、iPad)
添加调试设备
开发描述文件必须绑定调试设备,只有授权的设备才可以直接安装 App,所以在申请开发描述文件之前,先添加调试的设备。 (如果已经添加设备,可跳过此节)
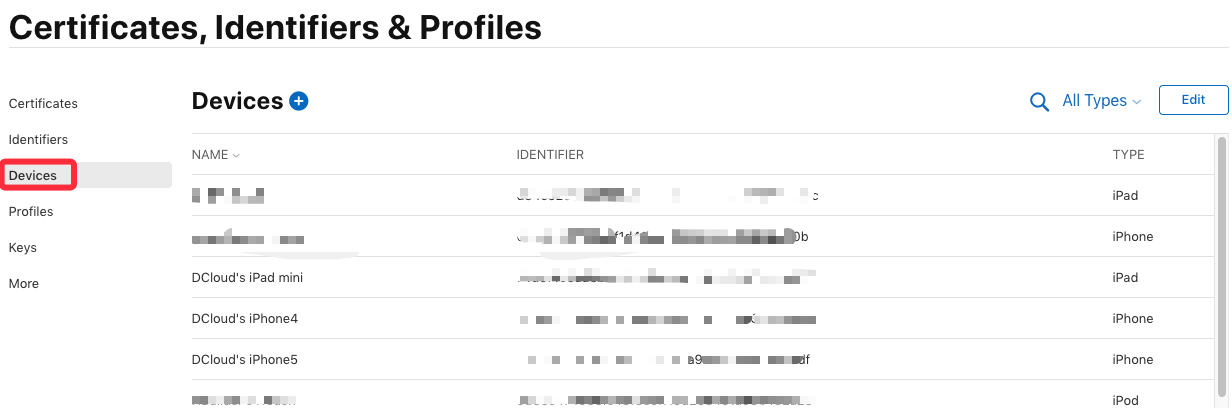
在证书管理页面选择 “Devices”,可查看到已添加的所有设备信息,点击页面上的加号来添加一个新设备:
填写设备名称 和 UDID(设备标识):
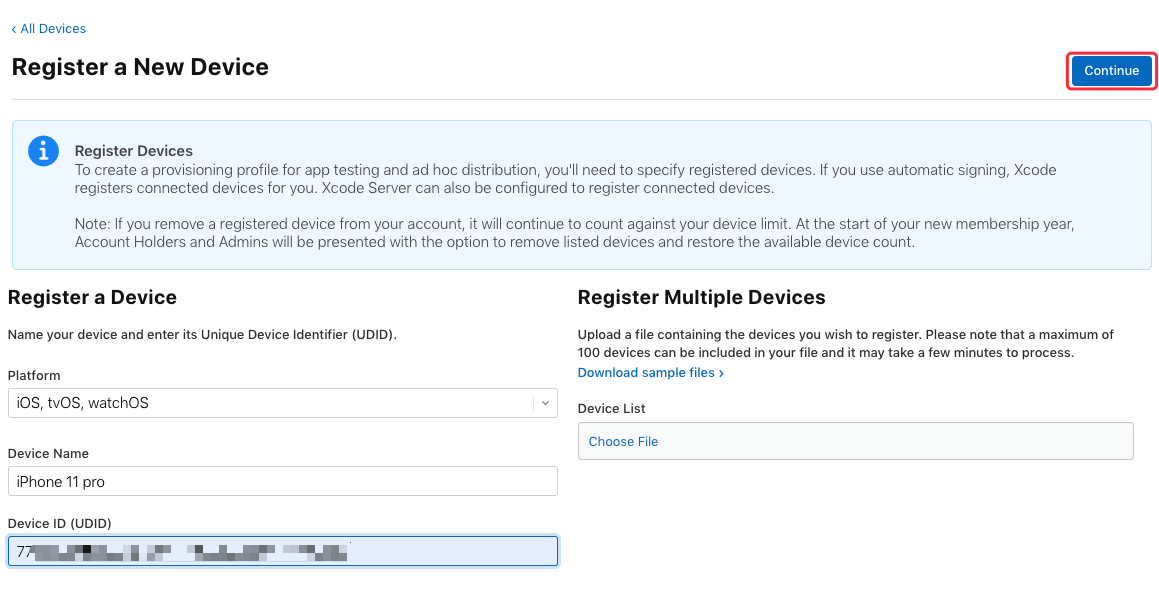
获取设备 UDID 方法,将设备连接到电脑,启动 iTunes,点击此区域可切换显示设备的 UDID,右键选择复制
输入完成后,点击“Continue” 继续完成添加即可;接下来继续申请描述文件
申请开发 (Development) 描述文件
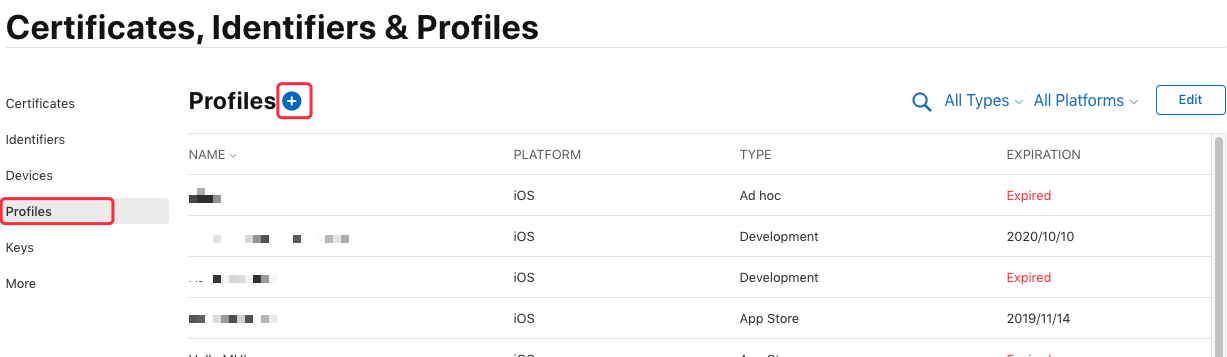
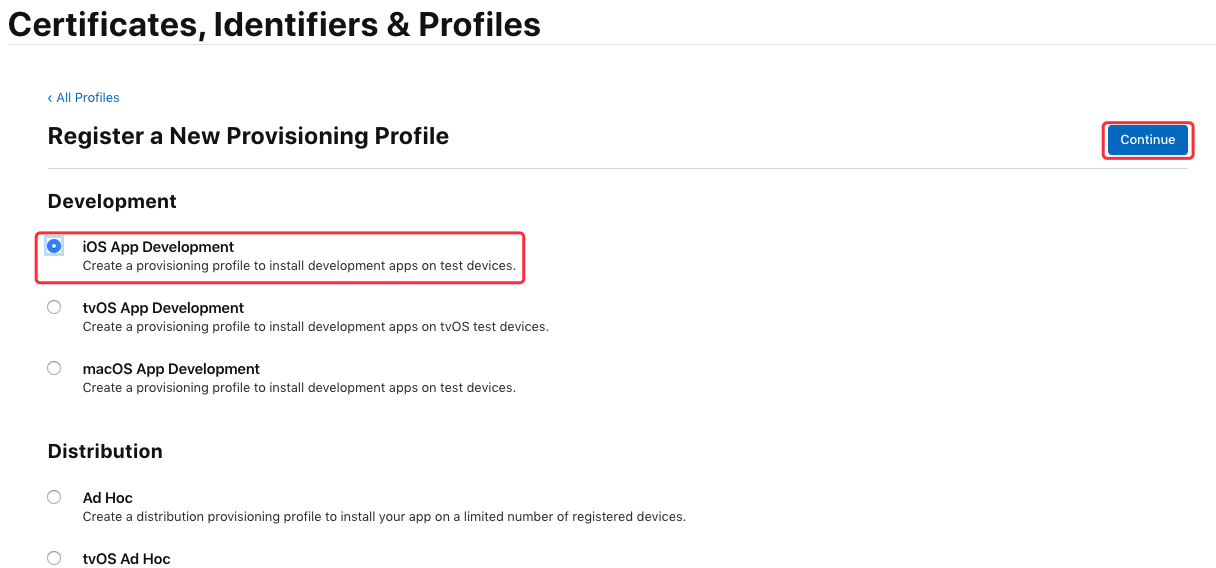
在证书管理页面选择 “Profiles”,可查看到已申请的所有描述文件,点击页面上的加号来添加一个新的描述文件:
在 “Development” 栏下选中 “iOS App Development”,点击“Continue”按钮:
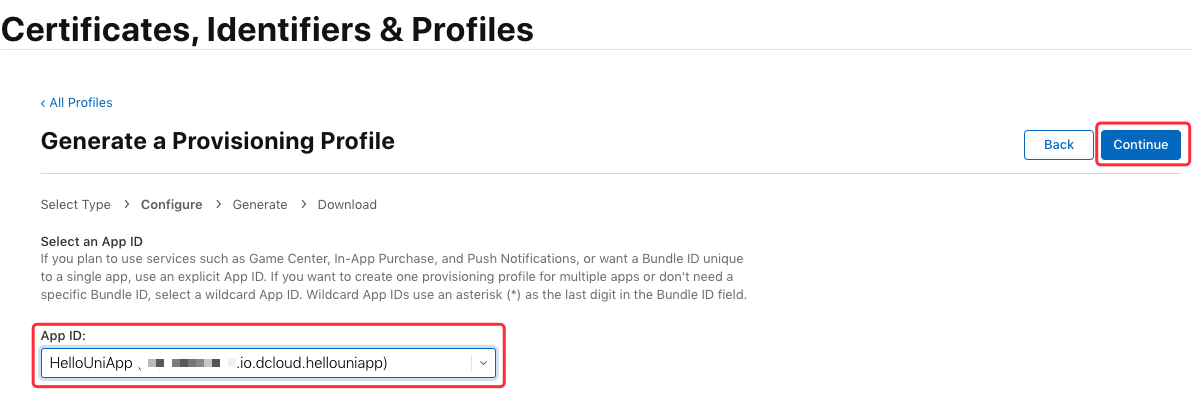
这里要选择之前创建的 “App ID” (这里是“io.dcloud.hellouniapp”),点击“Continue”:
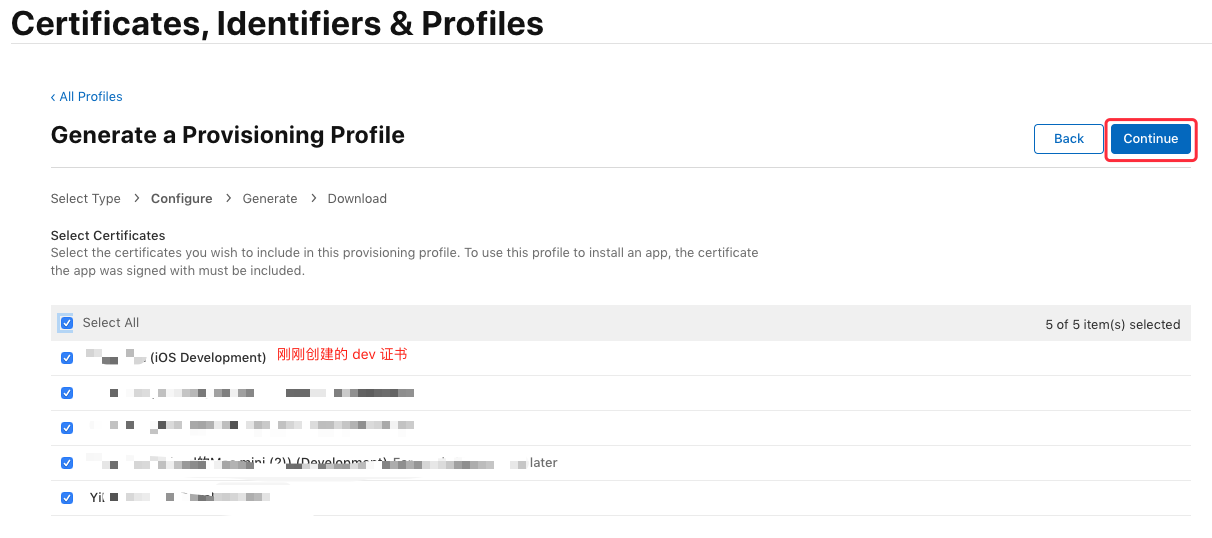
接下来选择需要绑定的证书,这里建议直接勾选 “Select All”,点击“Continue”:
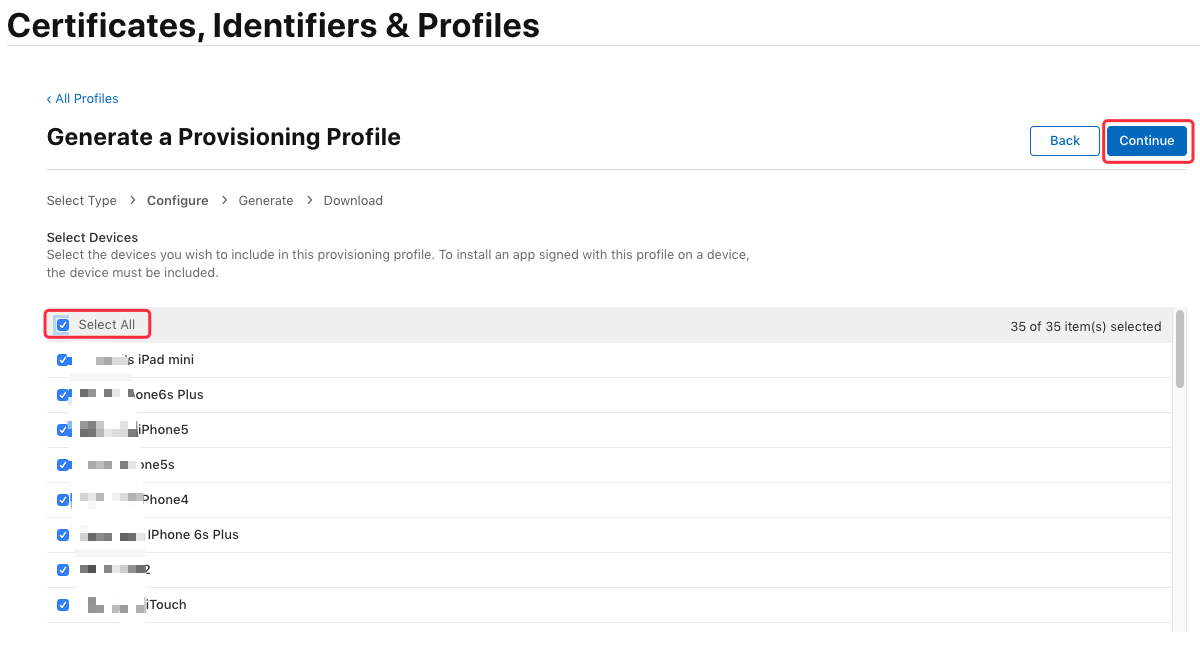
选择授权调试设备,这里建议直接勾选 “Select All”,点击 “Continue”:
输入描述文件的名称(如“HelloUniAppProfile”), 点击 “Generate” 生成描述文件:
点击“Download”下载保存开发描述文件(文件后缀为 .mobileprovision)

至此,我们已经得到了开发证书(.p12)及对应的描述文件(.mobileprovision),接下看一下如何制作发布证书及发布描述文件
申请发布(Distribution)证书和描述文件
发布 (Production) 证书用于正式发布环境下使用,用于提交到 Appstore 审核发布。发布证书打包的 ipa,不可以直接安装到手机上
申请发布(Production)证书
在证书管理页面选择 “Certificates" 可查看到已申请的所有证书(TYPE:Development 为开发证书,Distribution 为发布证书),点击页面的加号来创建一个新的证书:

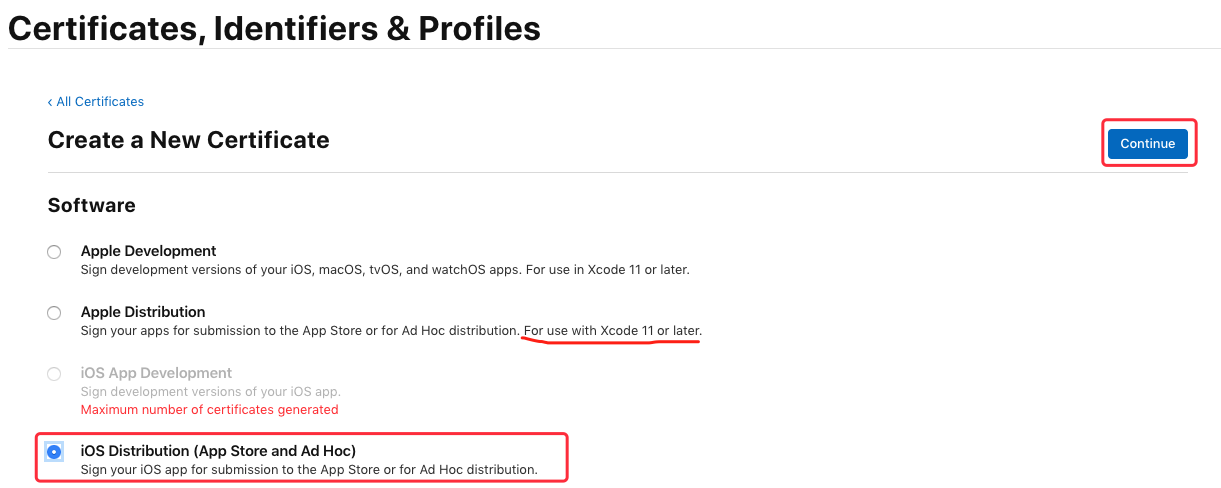
在 “Software” 栏下选中 “App Store and Ad Hoc”,点击 “Continue”:
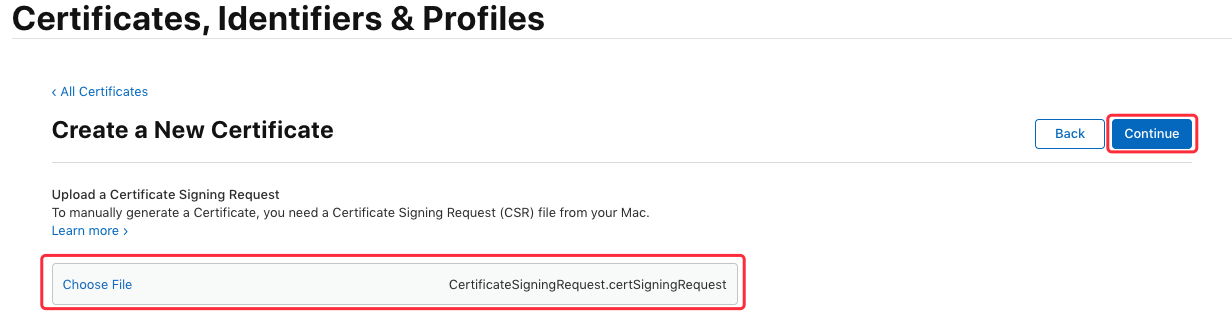
接下来同样需要用到之前生成的证书请求文件,点击“Choose File...”选择刚刚保存到本地的 “CertificateSigningRequest.certSigningRequest”文件,点击 “Continue” 生成证书文件:
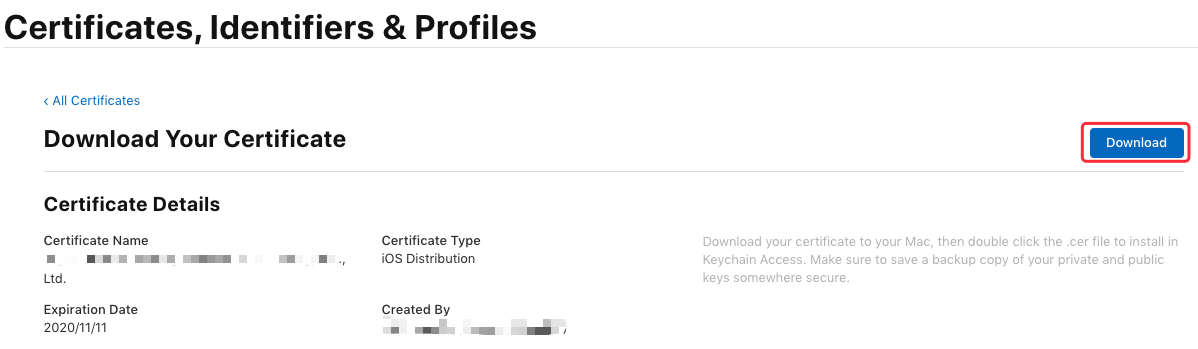
生成证书成功,选择“Download” 将证书下载到本地 (ios_production.cer):
同样双击保存到本地的 ios_production.cer 文件将证书导入到 “钥匙串访问”工具中,可以在证书列表中看到刚刚导入的证书,接下来需要导出 .p12 证书文件,选中导入的证书,右键选择 “导出...”:

输入文件名、选择路径后点击 “存储”:
输入密码及确认密码后点击 “好”:
至此,我们已经完成了发布证书的制作(得到了 xxx.p12 证书文件),接下来,继续生成发布描述文件
申请发布 (Distribution) 描述文件
在证书管理页面选择 “Profiles”,可查看到已申请的所有描述文件,点击页面上的加号来添加一个新的描述文件:

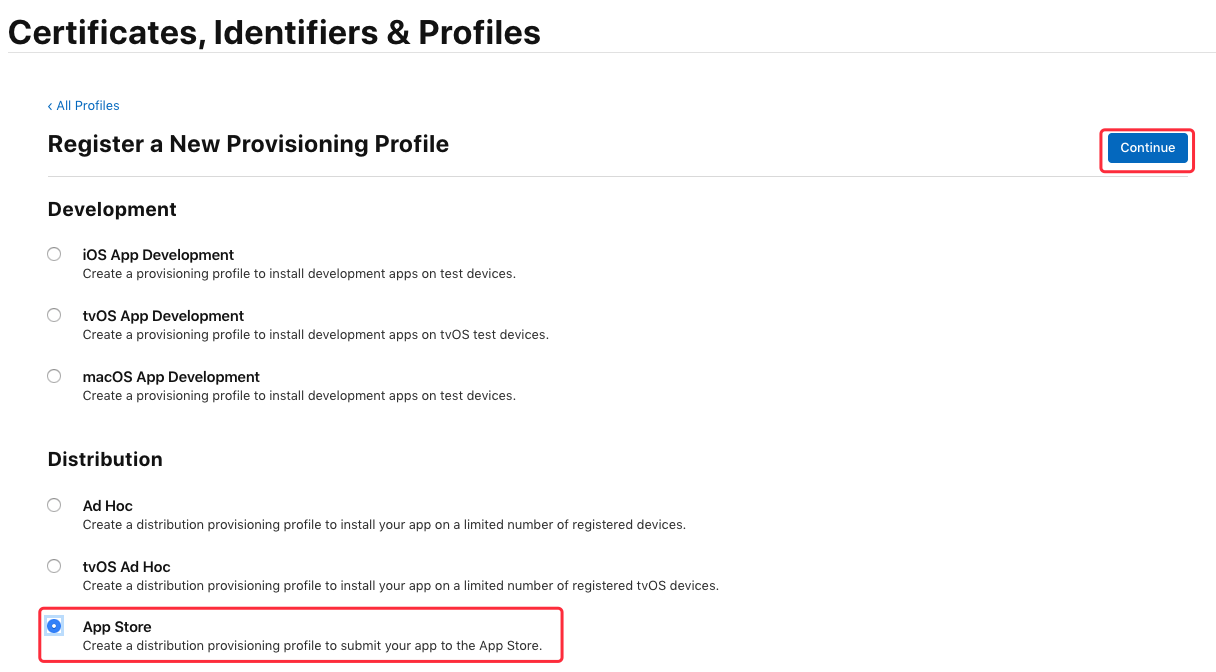
在 “Distribution” 栏下选中 “App Store”,点击“Continue”按钮:
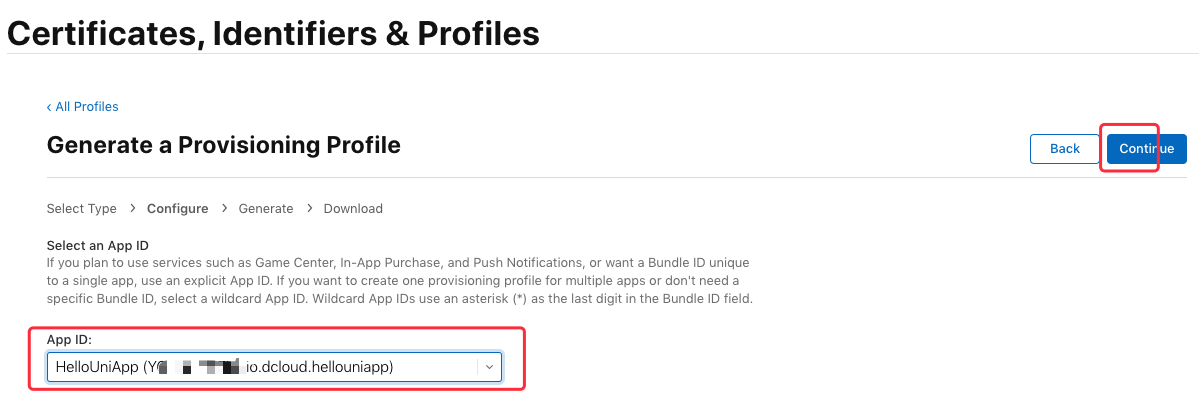
这里要选择之前创建的 “App ID” (这里是“io.dcloud.hellouniapp”),点击“Continue”:
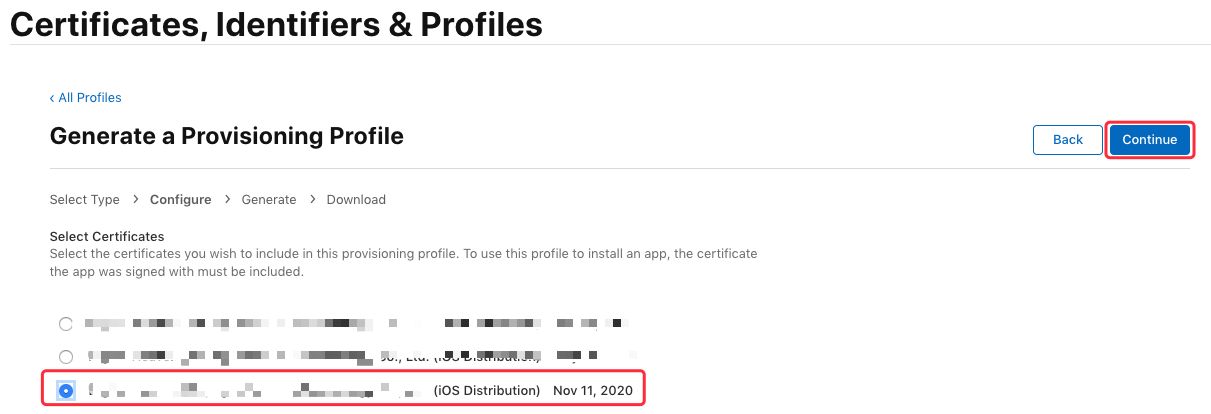
接下来选择需要绑定的发布证书(iOS Distribution),这里勾选刚刚生成的发布证书”,点击“Continue”:
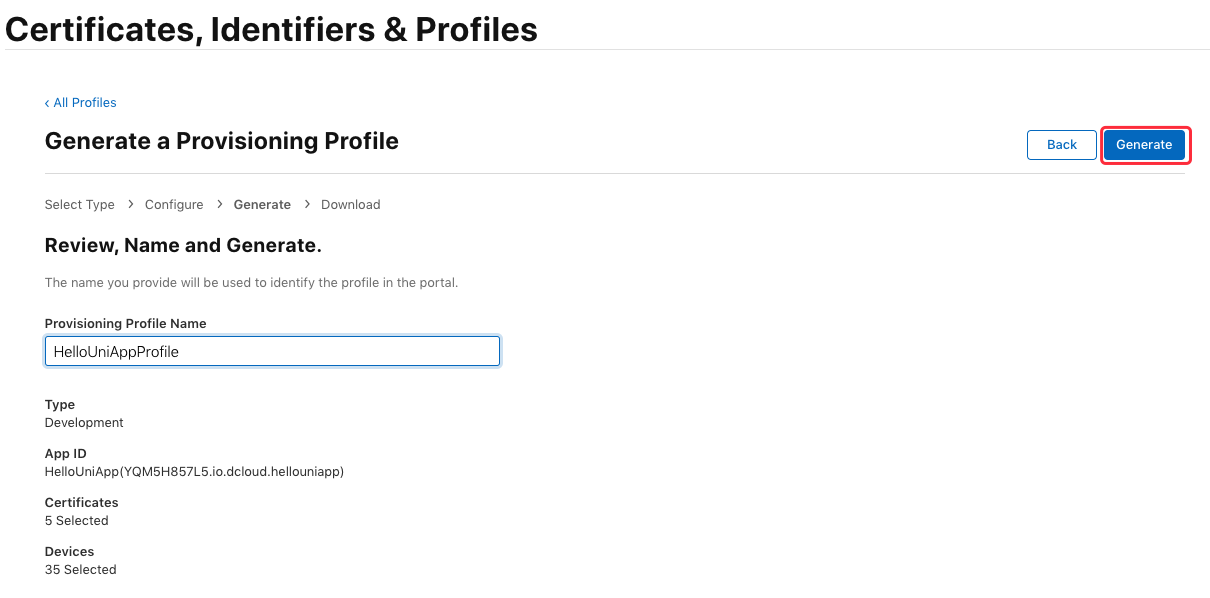
接下来输入描述文件的名称(如“HelloUniAppProfileDistribution”), 点击 “Generate” 生成描述文件:
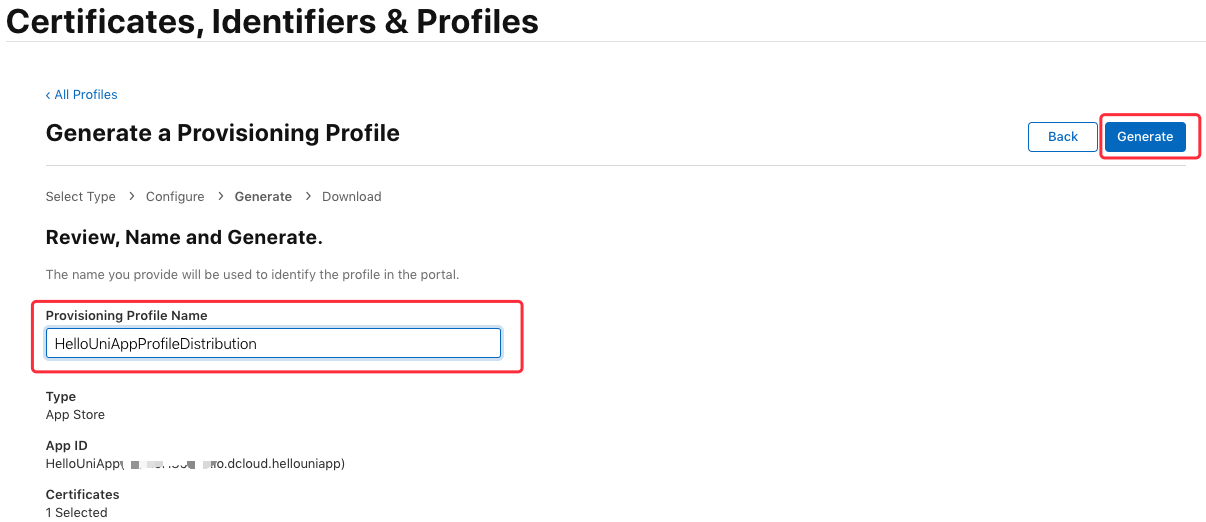
然后点击 “Download” 将描述文件下载到本地(文件后缀为 .mobileprovision)
至此,我们已经得到了发布证书(.p12)及对应的发布描述文件(.mobileprovision)